photography Archives - Amazing Journeys
Wanderlust Blog

Posts Tagged ‘photography’

Here at Amazing Journeys, we're lucky have the best jobs in the world—and we think our good fortune is worth sharing. So, when your next journey seems like a distant dream, take a few minutes to explore our WANDERLUST blog—it's chock full of engaging tales and helpful tips from our travels around the world. Check out the most recent entry (at the top) or search by your preferred criteria. Consider it motivation for your next embarkation.

Border

Top Reasons Why Erin Loves the Galapagos

Friday, February 23rd, 2024


When people ask me where my favorite trip has been, I have a hard time answering. Each location has so many highlights and I could always do more exploring in a new city or country, but the destination that is at the top of my list right now is the Galapagos. I’m lucky to have traveled to the Galapagos Islands last year with a group of Amazing Journeys travelers and it was truly amazing. It was such a unique destination with surprises along the way and I wanted to share some of my favorite aspects of the experience.

Wildlife – If you are a wildlife lover, the Galapagos Islands absolutely needs to be at the top of your “must travel” list! From marine iguanas to sea turtles to blue footed boobies to sea lions, there are incredible animals at every turn. Many of these species can only be found in the Galapagos and seeing them in their natural environment is just incredible.

Colors – As a photographer, the colors of the Galapagos Islands had my camera working overtime! I couldn’t get enough of the vibrant greens of the plants on land, the crystal clear blue waters, the contrast of the orange Sally Lightfoot crab against the stark black lava rocks and the wash of colors that were changing by the minute with each amazing sunset.

Activity level – Every day in the Galapagos is different – you could be snorkeling one day, taking a zodiac ride the next, kayaking, hiking or swimming. I love that you can be as active as you want on an itinerary like this, but that you can also enjoy everything that the islands has to offer from the comfort of the ship, on land or riding in a panga. Everyone in our group was able to make their experience exactly what they wanted and needed.

Remoteness – Imagine walking onto a quite beach with only the sounds of the water, the animals and your friends surrounding you – no lines, no traffic, no commotion. The Galapagos Islands are very restricted in the amount of visitors that come at one time, so as you are exploring, you sometimes feel like the only person in the world.

Cruising experience – Cruising is the only way I would want to explore the Galapagos Islands. Getting to sail from island to island makes the experience not only enjoyable and relaxing but allows you to maximize your time. You may explore one island in the morning, come back onboard for lunch and be in a different location in the afternoon. The expedition ship has a small number of passengers but boasts a delicious restaurant, casual places to relax, a dedicated learning space and experts that travel with you.

I could go on and on, but I guess I will stop here. If you’ve ever considered a visit to the Galapagos Islands, I encourage you to check it out! And if you’re considering it in the near future, I highly (highly) encourage you to come with us on the amazing journey to Ecuador and the Galapagos in December. Can you imagine ringing in the new year under the star covered sky while floating in between islands of the Galapagos? Pretty cool, huh? Whether you’re an animal lover, a water sports enthusiast, a photographer, a lover of cultures, someone who is looking for a unique way to celebrate New Year’s, or any other type of traveler, you are in for an experience of a lifetime. To see some of the things we’ll be seeing and doing on our trip, click here to watch a little video we’ve put together for you.

We hope to see you soon in this amazing part of the world!

Erin

What Do I Miss Most About Travel – Erin

Tuesday, July 21st, 2020

by Erin


One of the many things that I have inherited from my father is a love of photography – capturing the life of a country, the beauty of nature or the fun of a situation.  Now don’t get me wrong, I have still been taking a lot of pictures in these months where we have not been able to travel, but it still feels like something is missing.

To be able to go to a new destination and experience it is a feeling like no other.  To be able to remember all of the amazing things that you did is nearly impossible.  That’s why I try to document as much as I possibly can, knowing that when I come home, I will be able to re-live all of those moments again while going through my pictures.

Before digital photography, I would average about a roll of film a day, taking pictures of the things I saw, but limiting myself to the number of shots available.  Now, I click, click, click all day long and go through the pictures after the fact, allowing myself to be more in the moment and try to capture everything.

Like many of you, my pictures usually just live on my computer and I don’t do much with them.  But one of the projects that I have committed myself to during this pandemic is to go through my years of travel pictures and print a few that I want to feature on the wall in my living room.  Rather than just going through them on my screen, I want my pictures to come to life.  Not only to brighten the walls of my house, but also to bring a smile to my face.  Each picture is a memory and a moment in time that I remember fondly.

So even though we may not have the opportunity to take pictures of new countries and cultures for now, that is no reason to put away your camera (or cell phone).  Keep snapping away to recall what is happening in your daily life now, and know that one day, your pictures will start to be of new things and they will bring new memories and stories, as well!

Malori’s Top 10 List for Scenic Beauty

Tuesday, June 18th, 2019

by Malori 

Everyone’s got a top 10 list: TripAdvisor, 1,000 Things to See Before You Die, Conde Nast Traveler, The New York Times, Viator…  I’ve decided to create my own. Having escorted groups to 7 continents, traveled to 130 countries, sailed on 126 cruises, and visited 38 US states, I consider myself to be well qualified for this task.

Today I want to share: Malori’s Top 10 List for Scenic Beauty (OK, I had to go with 12)

There are so many amazing places on this earth that are so beautiful, being in any one of them actually takes my breath away.  I have been so fortunate to have had several such experiences.  And let’s face it, since beauty is in the eye of the beholder, we may all have different places that excite and inspire us.  For me, it’s where the snow covered mountains meet a body of water, be it a sea, a lake an ocean or a river. 

With many places, an entire region or even most of the country is so spectacular, it would win a top spot on my list, but I went with the more specific destination, just in case you should decide to visit… I promise, it’ll be so worth it!

  1. Canadian Rockies (Banff, Lake Louise), Alberta, Canada

  2. Queenstown, New Zealand

  3. Jokulsarlon Beach and Lagoon (also known as Diamond Beach), Iceland

  4. Inside Passage, Alaska

  5. Lake Tahoe, CA

  6. Vail, Colorado

  7. Jungfrau, Switzerland

  8. Flam, Norway

  9. Antarctica

  10. Glacier Alley, Chilean Fjords, Chile

  11. El Chalten, Patagonia, Argentina

  12. Iguazu Falls, Argentina and Brazil


If you can get to any one of these magical spots on earth, consider yourself lucky.  More than one, consider yourself blessed.  I’ll be back with a new list in the coming weeks!  

Strike a pose

Thursday, May 9th, 2019
by Erin


If you’re looking for your next amazing social media picture, look no further than South America! Imagine the reactions from your friends and family when they see a picture of you waddling with penguins or hiking through a bog.


The pictures we share on Facebook, Instagram and other social media platforms are indicative of the persona that you choose to portray.  Whether you surround yourself with gorgeous scenery, hop in with a group of locals, strike a silly pose or showcase your meal, everyone takes different pictures.


South America offers such a wide variety of landscapes, animals, architecture and culture that you will be posting your experience and met with awe and jealousy.    

We are so excited to be going back to South America and absolutely love the itinerary that showcases Argentina, Uruguay and Chile as well as destinations like the Chilean Fjords and Strait of Magellan. Celebrating New Year’s at sea is one of our favorite activities and going back to Easter Island to visit the Moai statues is amazing!

So if you’re ready to snap a few selfies, share with your social network and show off your amazing journey, come join us in South America!

South America trip details can be found by clicking here.


The Colors of French Polynesia

Wednesday, February 27th, 2019

by Erin

They say a picture is worth a thousand words, but in some cases, a picture can leave you speechless.  Imagine capturing an image that is so beautiful that people don’t believe it’s real.  But that is exactly what happens as soon as you take out your camera in French Polynesia.  Even the amateur photographer who simply snaps a picture – without care of composition or settings – is able to catch the most beautiful colors that is at every turn in French Polynesia.

The water changes from azure to cobalt to cerulean to turquoise as you sail through the lagoon.  As you cruise up to an atoll, the water is so clear you can see the fish swimming around you before you even jump in the water.  The sunsets bring gorgeous amber, tangerine and lavender that slowly fade behind the black silhouette of the island leaving you ready for another day of sheer amazement.

These pictures are not retouched in the slightest – there are no filters to enhance the colors nor are they edited to any degree – they just show the true colors of French Polynesia and you can see why this destination is such a dream to visit.  Take a look at some of the incredible beauty that we saw on our cruise through French Polynesia by clicking on the images and be sure to add this drool-worthy destination to your bucket list!

Cold Weather Photography

Monday, September 24th, 2018

by Barry

I know that many of you, just like me, love to take pictures.  What better way to remember your travels than coming home with amazing pictures to show off and hang up?

Photography in cold weather destinations like Iceland or Antarctica could present some “interesting” challenges.  These revolve mainly around the weather and climate you will be enjoying.  What comes to mind initially is the temperature that you will be experiencing.

Preparing for taking pictures in cold weather destinations can be divided into two categories:
1. Taking care of your camera and
2. Taking care of yourself.

First, most important, and most basic, is to take care of yourself.  This means staying warm.  I’m not going to talk a lot about this topic in general.  I’ll leave this to your research.  The one thing that I do want to mention is keeping your hands warm.  As you are anticipating, the key here are gloves.  What I do is bring a pair of regular warm gloves that I use here in Pittsburgh to stay warm and a special pair of “fingerless” gloves so that I have dexterity to operate my camera in the cold.  There are several types of these “fingerless” gloves to use.  My suggestion is to go to a sporting goods store (or online) and head to the hunting section.  Hunters use these gloves all the time.  Here is an example.  Now, let’s talk photography!  There are two issues that make photography in the cold “interesting”; power and water.

First let’s talk about power (batteries).  The thing to remember is that, in cold temperatures, battery power goes down quickly.  There is an easy solution to this; carry extra batteries.  If you camera uses regular batteries, just pop a couple of extra sets in your coat close to your body (to keep them warm).  When the set in your camera gets cold and stops working, just change them out for a “body warmed” set.  (The cold set will come alive when warmed up again.)  If your camera takes only proprietary rechargeable batteries, go to the camera store (or order) a second battery.  Keep one warm while you shoot with the other; then just swap them out.  Easy enough!

Now, let’s talk about water, two kinds:  Ocean Spray and Condensation.

The easy one first:  Ocean Spray.  In places like Antarctica, you will be getting to shore by Zodiac rubber boats.  There is the chance that you, and therefore your camera, may get wet.  The solution is to transport it to shore in a waterproof bag.  While a sealable baggy may be adequate, I prefer a “Dry Bag” to really protect my camera – here is the kind I have.  The size you get depends on your camera size.

I’ve saved the “best” for last:  Condensation.  If you’ve been outside for a while in the cold air, then go inside the warm house; what’s the first thing that happens?  Your glasses fog up.  This occurs when your cold glasses hit the warm air.  The same thing will happen to your camera.  If you take your cold camera in to a warm room, the camera will instantly form condensation (water droplets) not only on the camera, but also inside the camera.  Remember, water and electronics are not happy together, i.e. your camera’s guts will “fry”.

Preventing condensation on your camera is very important and not too difficult.  Here’s the solution:  While your camera is still cold, put it in a sealable plastic bag, and seal it tightly.  Leave it in the sealed bag until, once back inside the ship, the camera slowly warms back up to room temperature.  Problem solved!  (Going from warm to cold should not be a problem, only cold to warm.)  I actually throw a couple of those Silica Gel desiccant packs (the kind that comes with your new shoes to keep them dry) in my camera bag and the plastic bag for added protection.

Now, some of the above advice may be overkill, but you can never be too prepared.

My final words of wisdom:
1. Take plenty of memory cards
2. Take plenty of batteries and appropriately sized sealable baggies (see above)
3. If you’re going to get a new camera for the trip, get it now and learn how to use it now (don’t wait to open the box on the plane on the way to your destination!)
4. Practice using your camera and all of its settings.  Being familiar with your camera will pay off in improved pictures.

Now you have one less thing to worry about as you prepare for your next cold weather amazing journey.  Happy shooting!

Tips for Better Travel Photos

Tuesday, May 12th, 2015


It wasn’t that long ago that many travel photos were taken, developed and then dumped into boxes, rarely to be seen again. These days, things aren’t so different except that now the photos get dumped onto external hard drives.

In most collections of vacation and travel photos, a precious few of the very best shots are often spared this fate – those photos that are somehow more enduring or more interesting, or that best capture the spirit and sensation of the trip. What is it that keeps these photos from the dustbin of our traveling history? Often they are simply better photographs. That is, the “keeper” photo isn’t of a favorite person, place or activity – it is better composed, better lit and thus simply more visually interesting than the run-of-the-mill vacation snapshot.

Following is a collection of low- and no-tech tips to help you improve your photography skills for your next trip.

Think “people, places, things.” 3843904037_10b131c0eb_b
This old definition of the use of a noun is a handy guide to a great vacation photo: the best travel photos will often be about all three of these. To illustrate, let’s say you want to take a photo of the Tower of London on a rainy day. If you pull up your photo and snap the Tower in the gray light, you could get a decent photo. But if you put your friends in the photo with the Tower glimpsed over their shoulders (the place of interest), visible just under the rim of an umbrella (a very specific thing that evokes the conditions), you have a great shot.
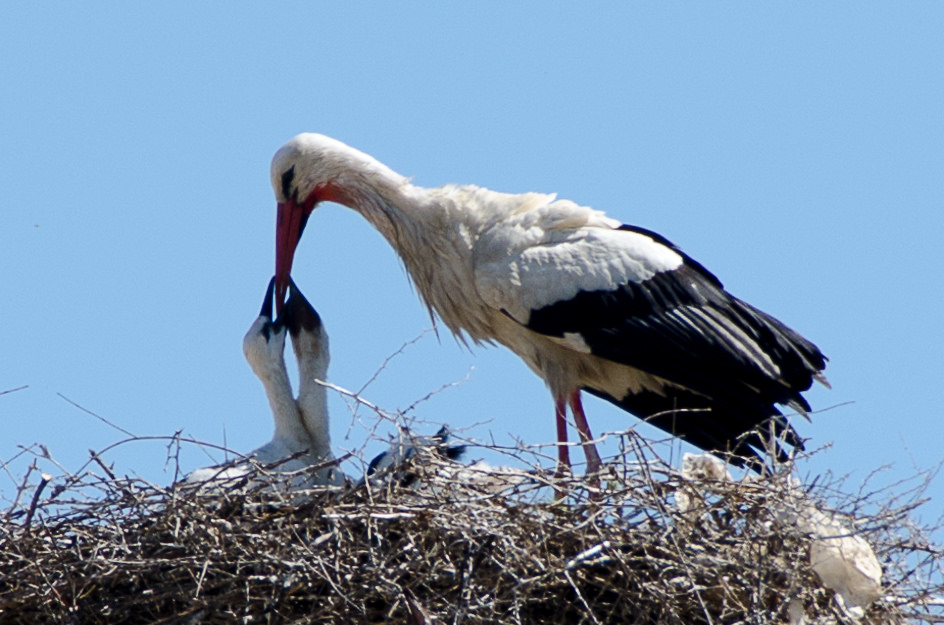
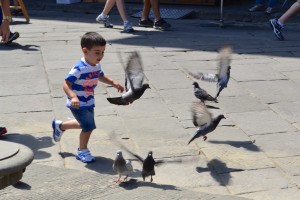
Get closer. 14279953926_97bcbb87a6_h
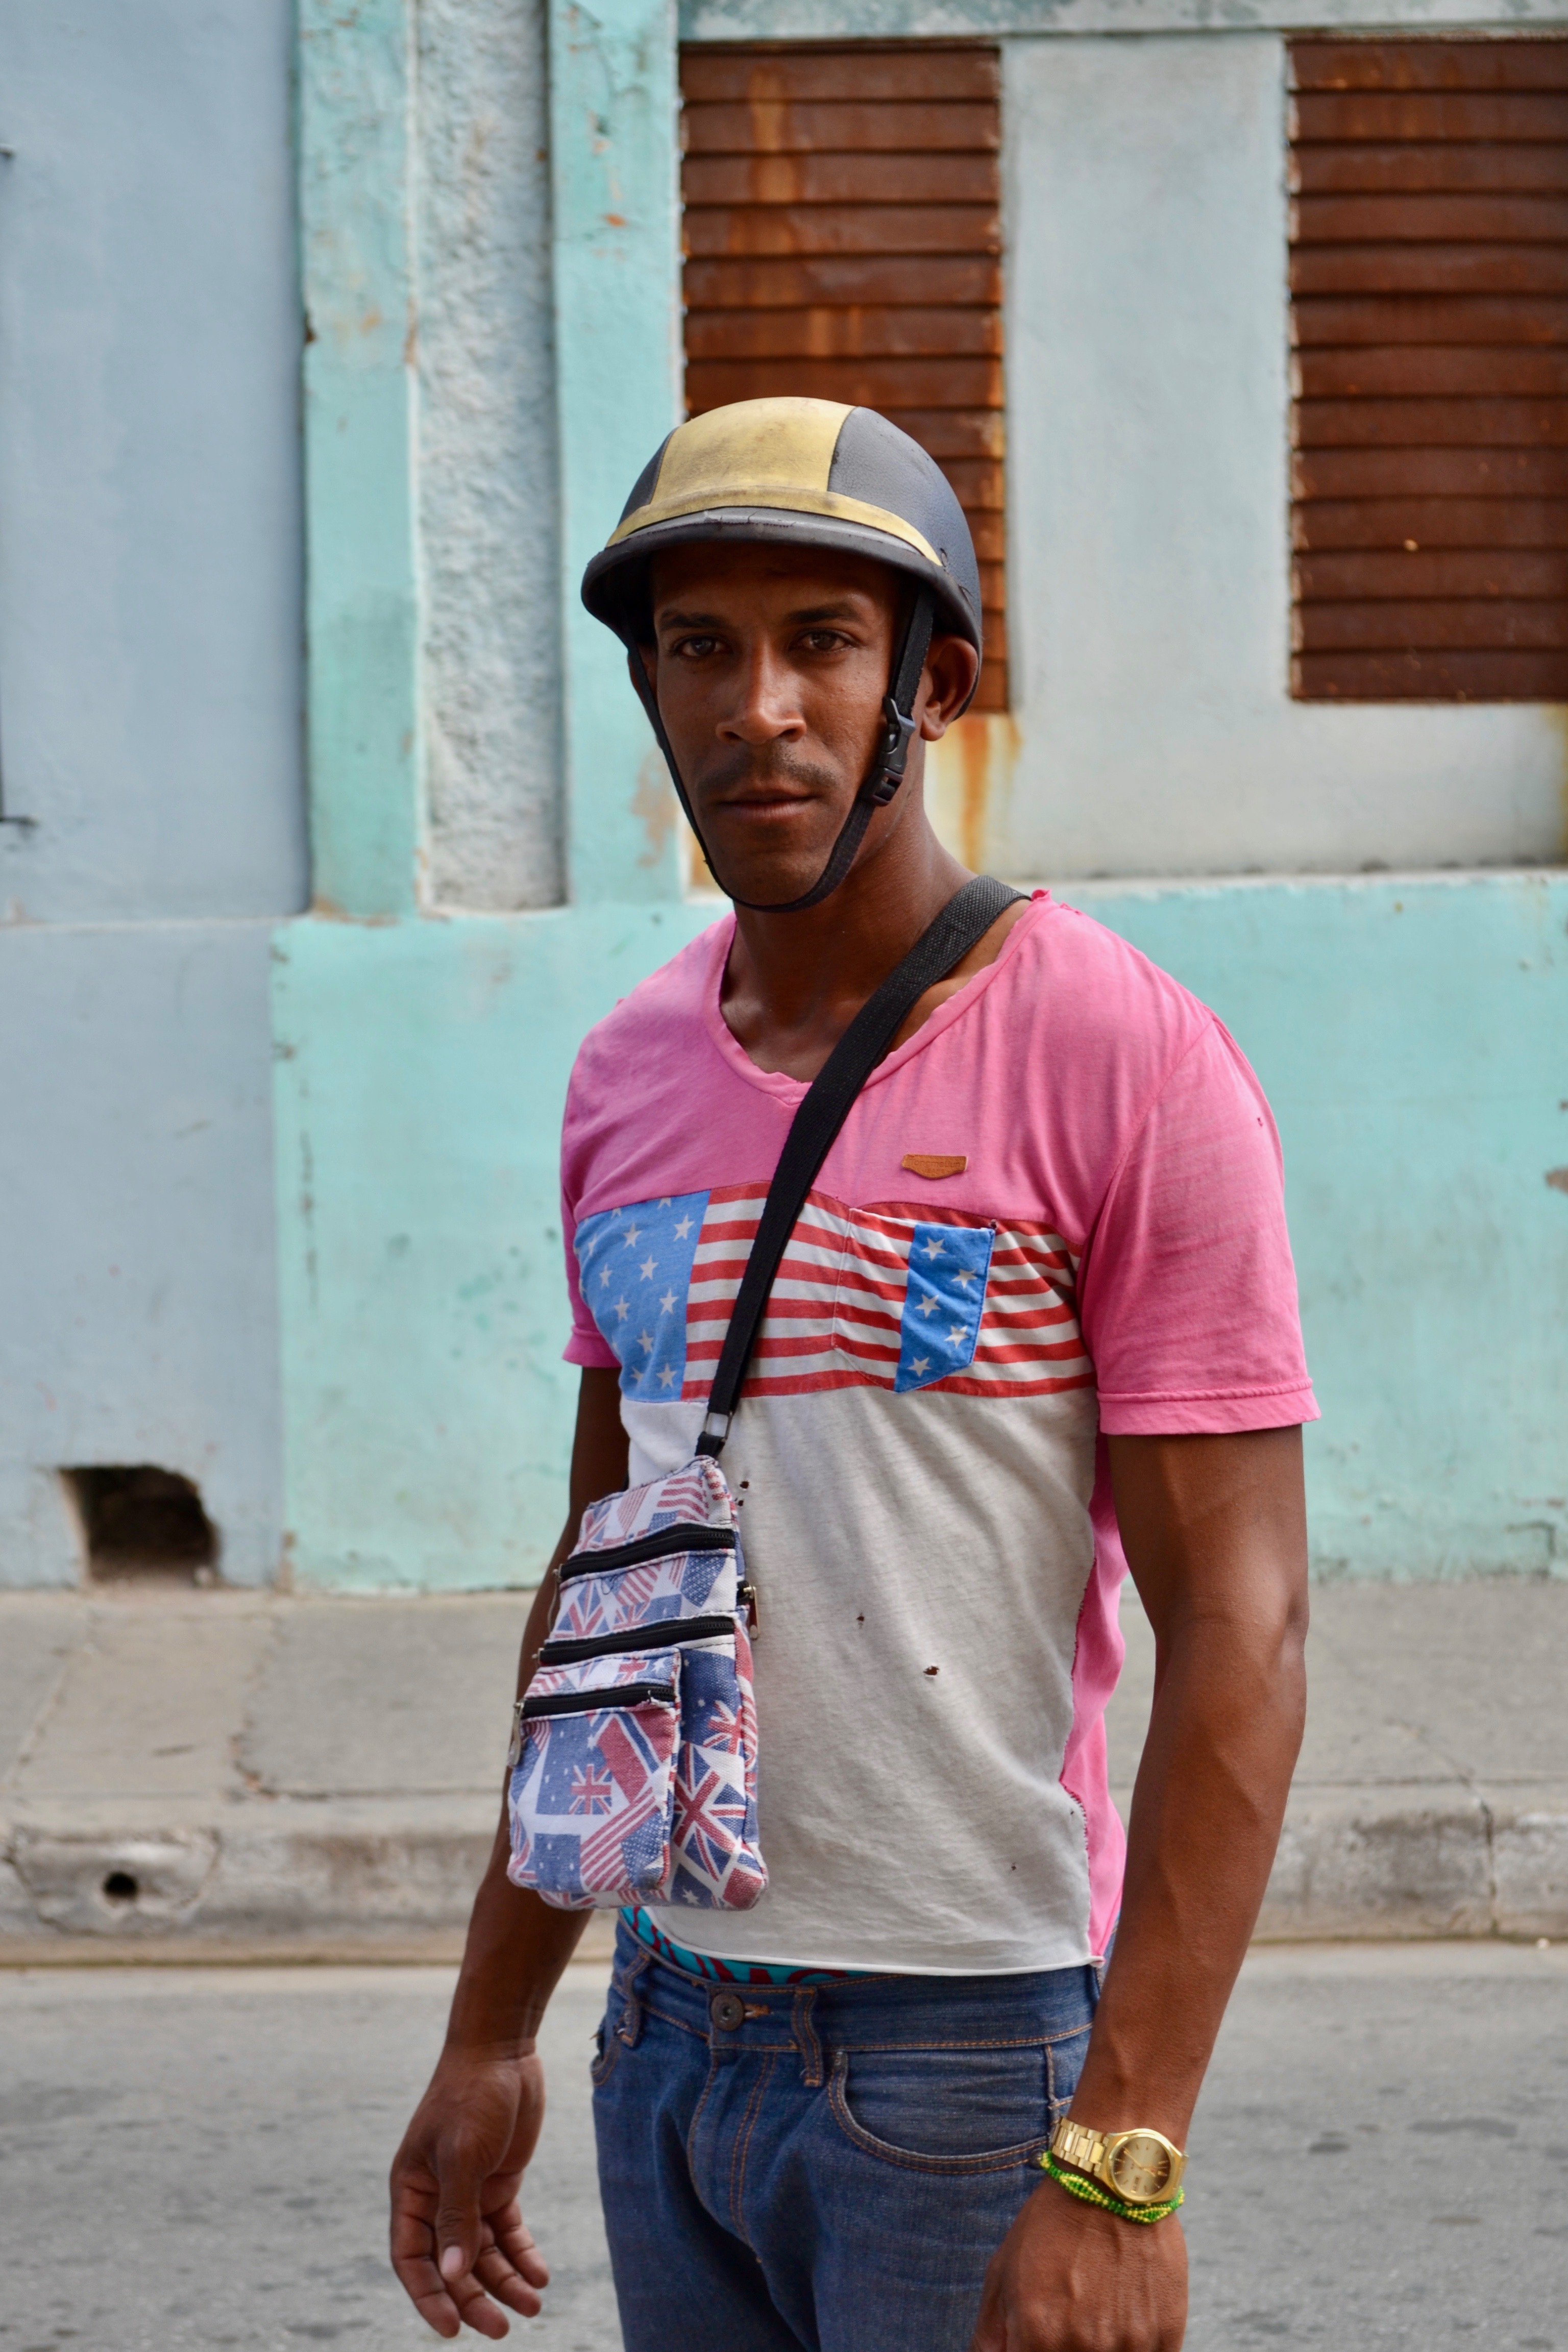
As Robert Capa famously said, “If your pictures aren’t good enough, you’re not close enough.” Taken literally, the closer you get to your subject, the more detail and interest you can capture.

There are a couple of ways to do this, both equally valid and effective. One is to use the telephoto features found on most cameras to zoom in on your subject. Before anyone cries cop-out, this can be a very effective photographic technique, and has resulted in countless compelling images in this age of big lenses.

The other is simply to walk closer to your subject. Not everyone is comfortable doing this, but the person viewing the photo will appreciate it; despite how close a zoom lens makes things appear, when viewing a photo the human eye can still sense the distance, and appreciates when an image has truly been taken up close.

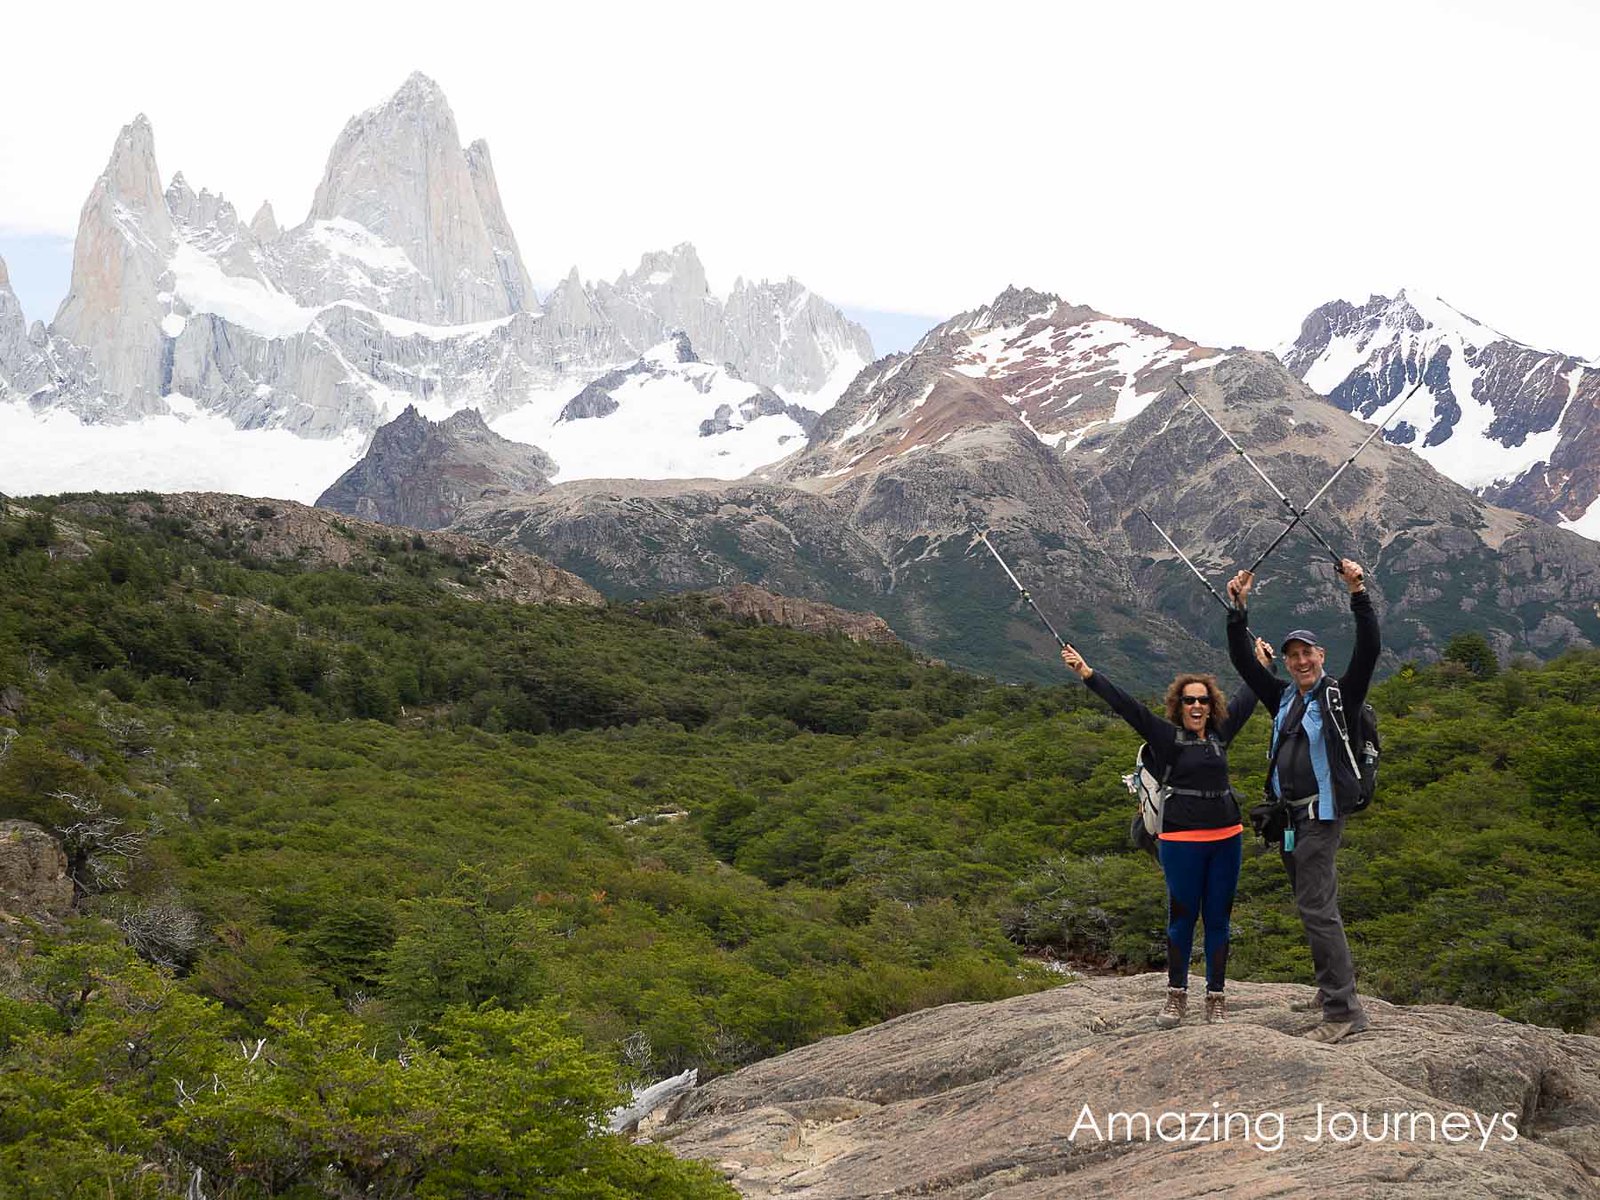
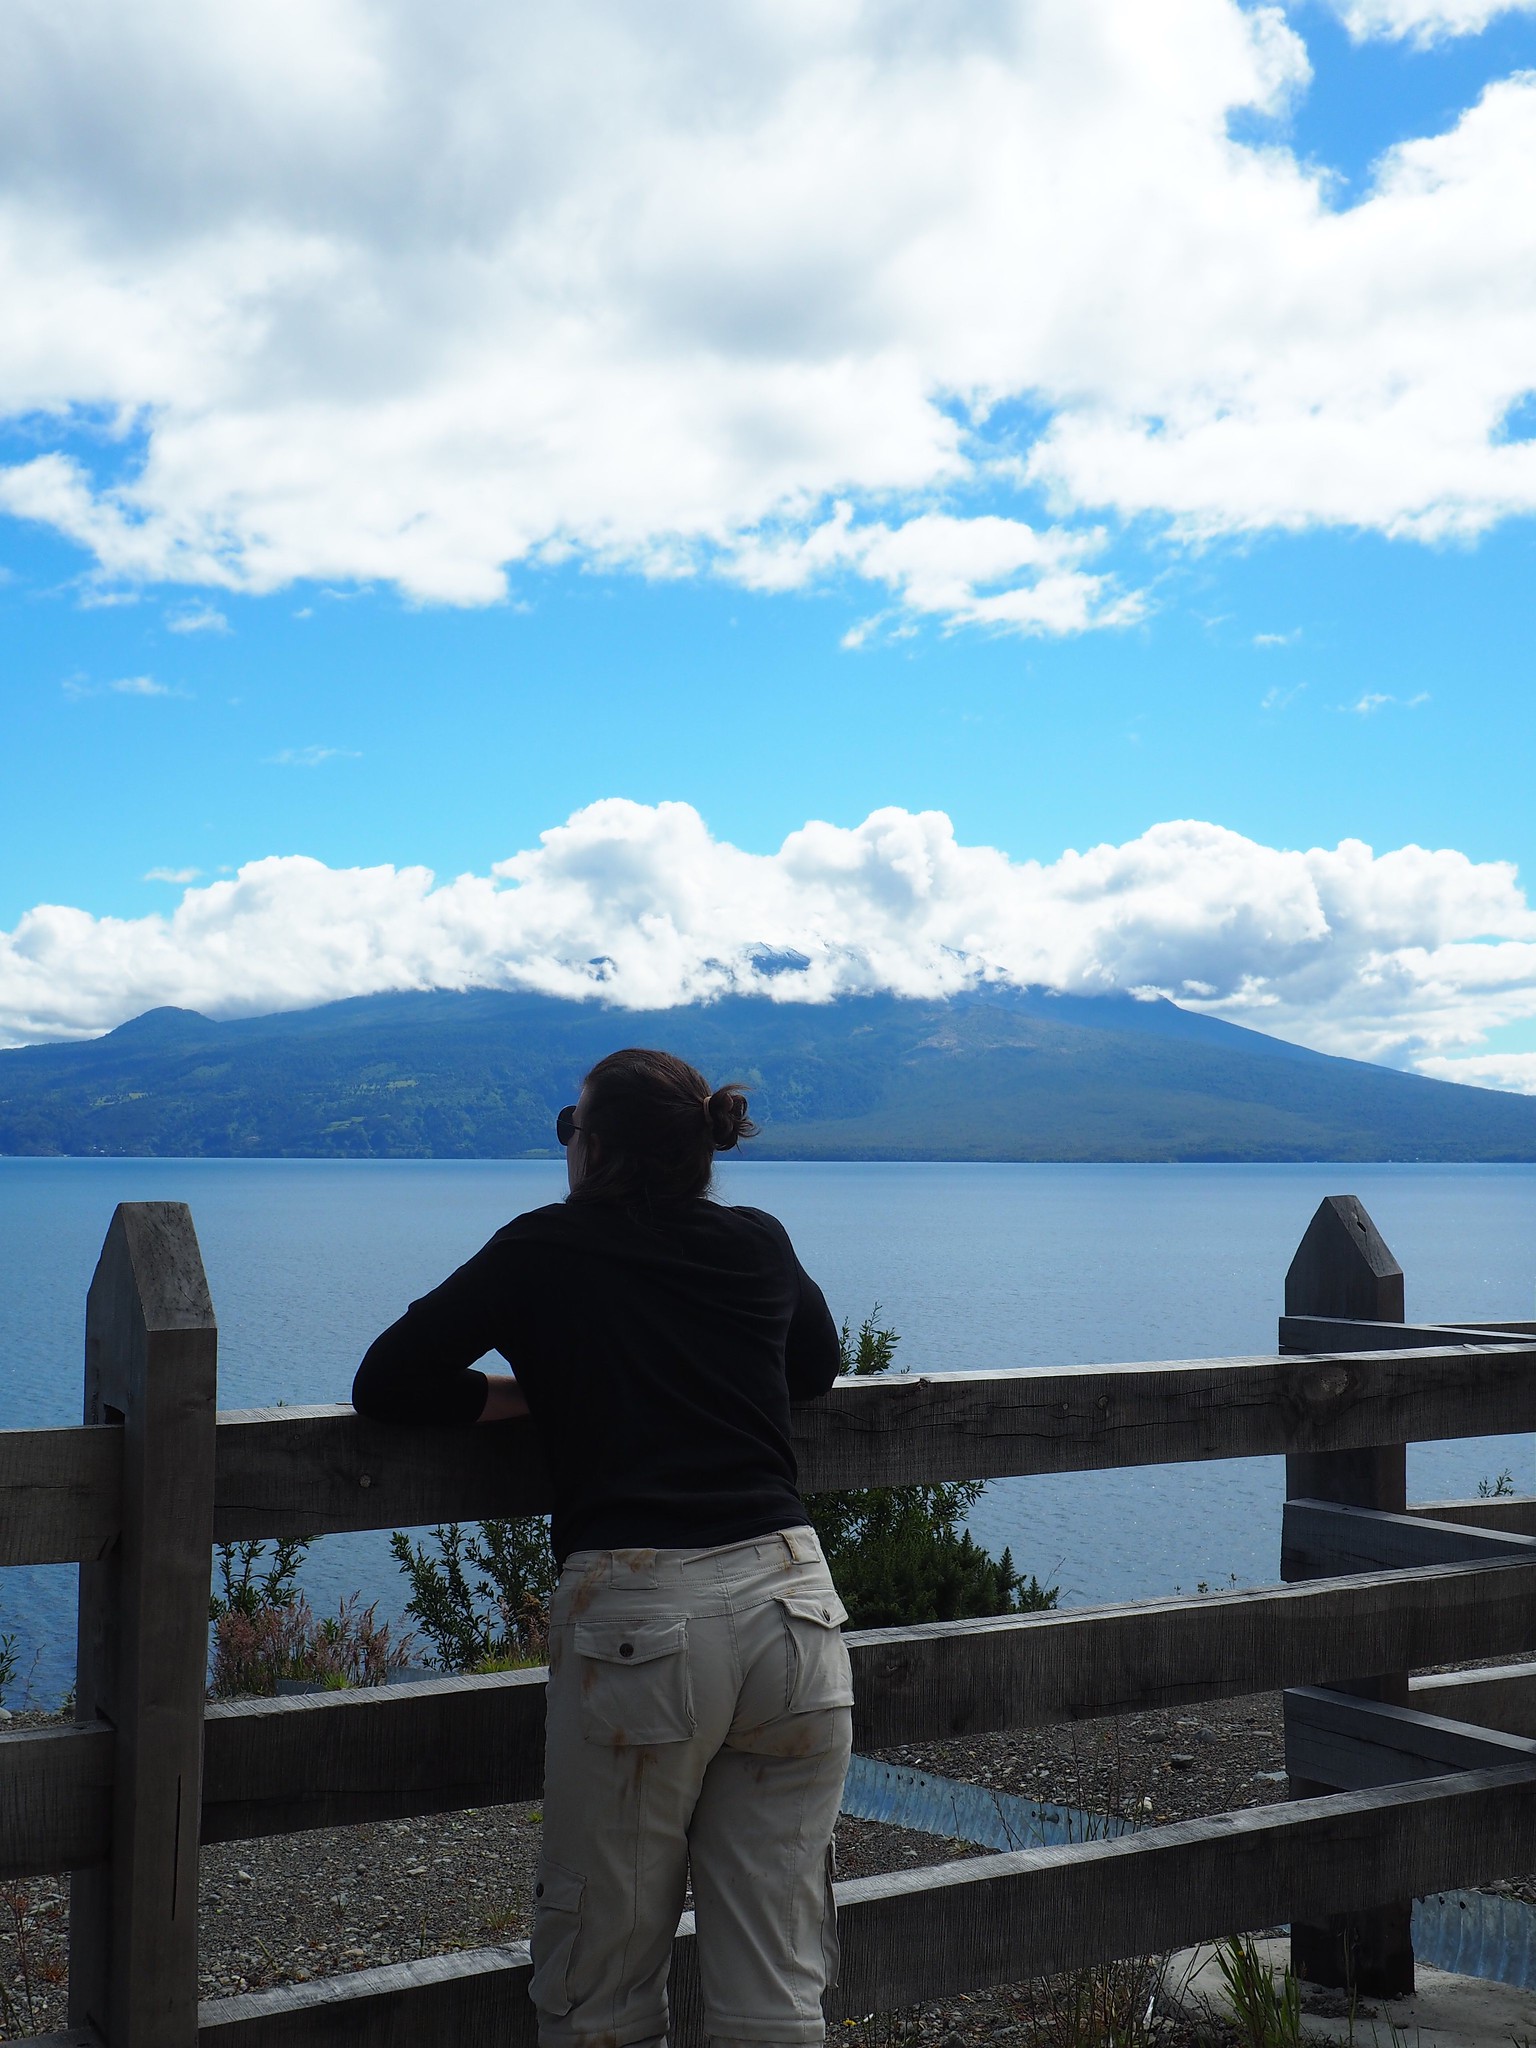
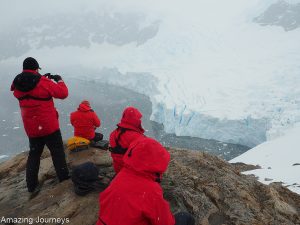
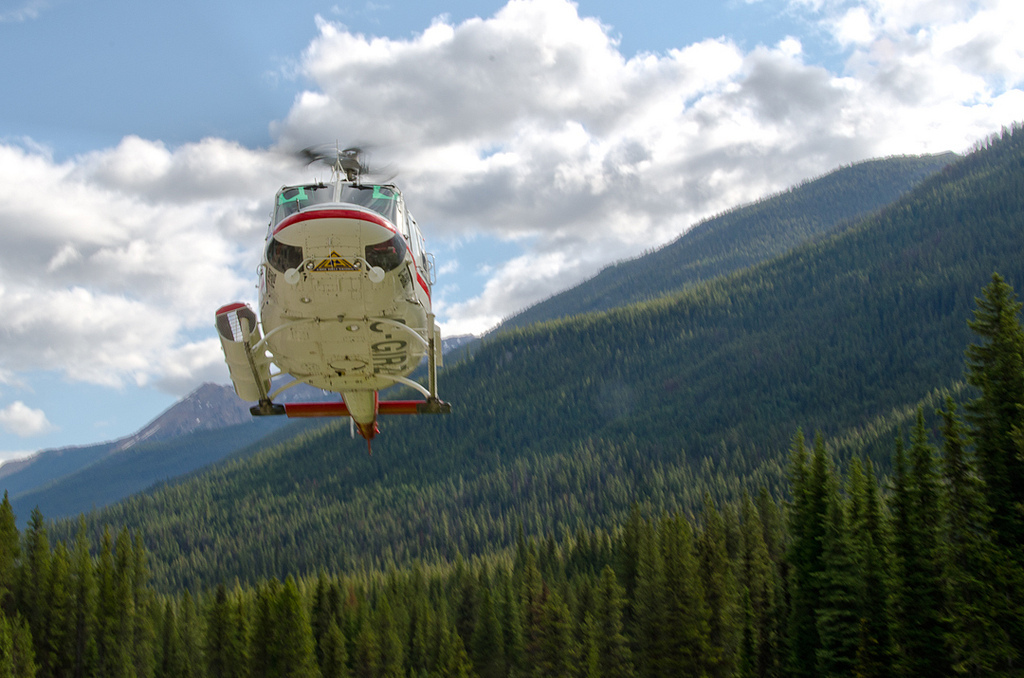
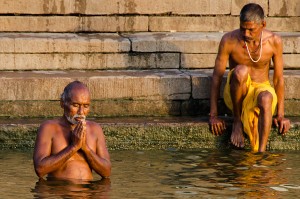
Be in the thick of it.
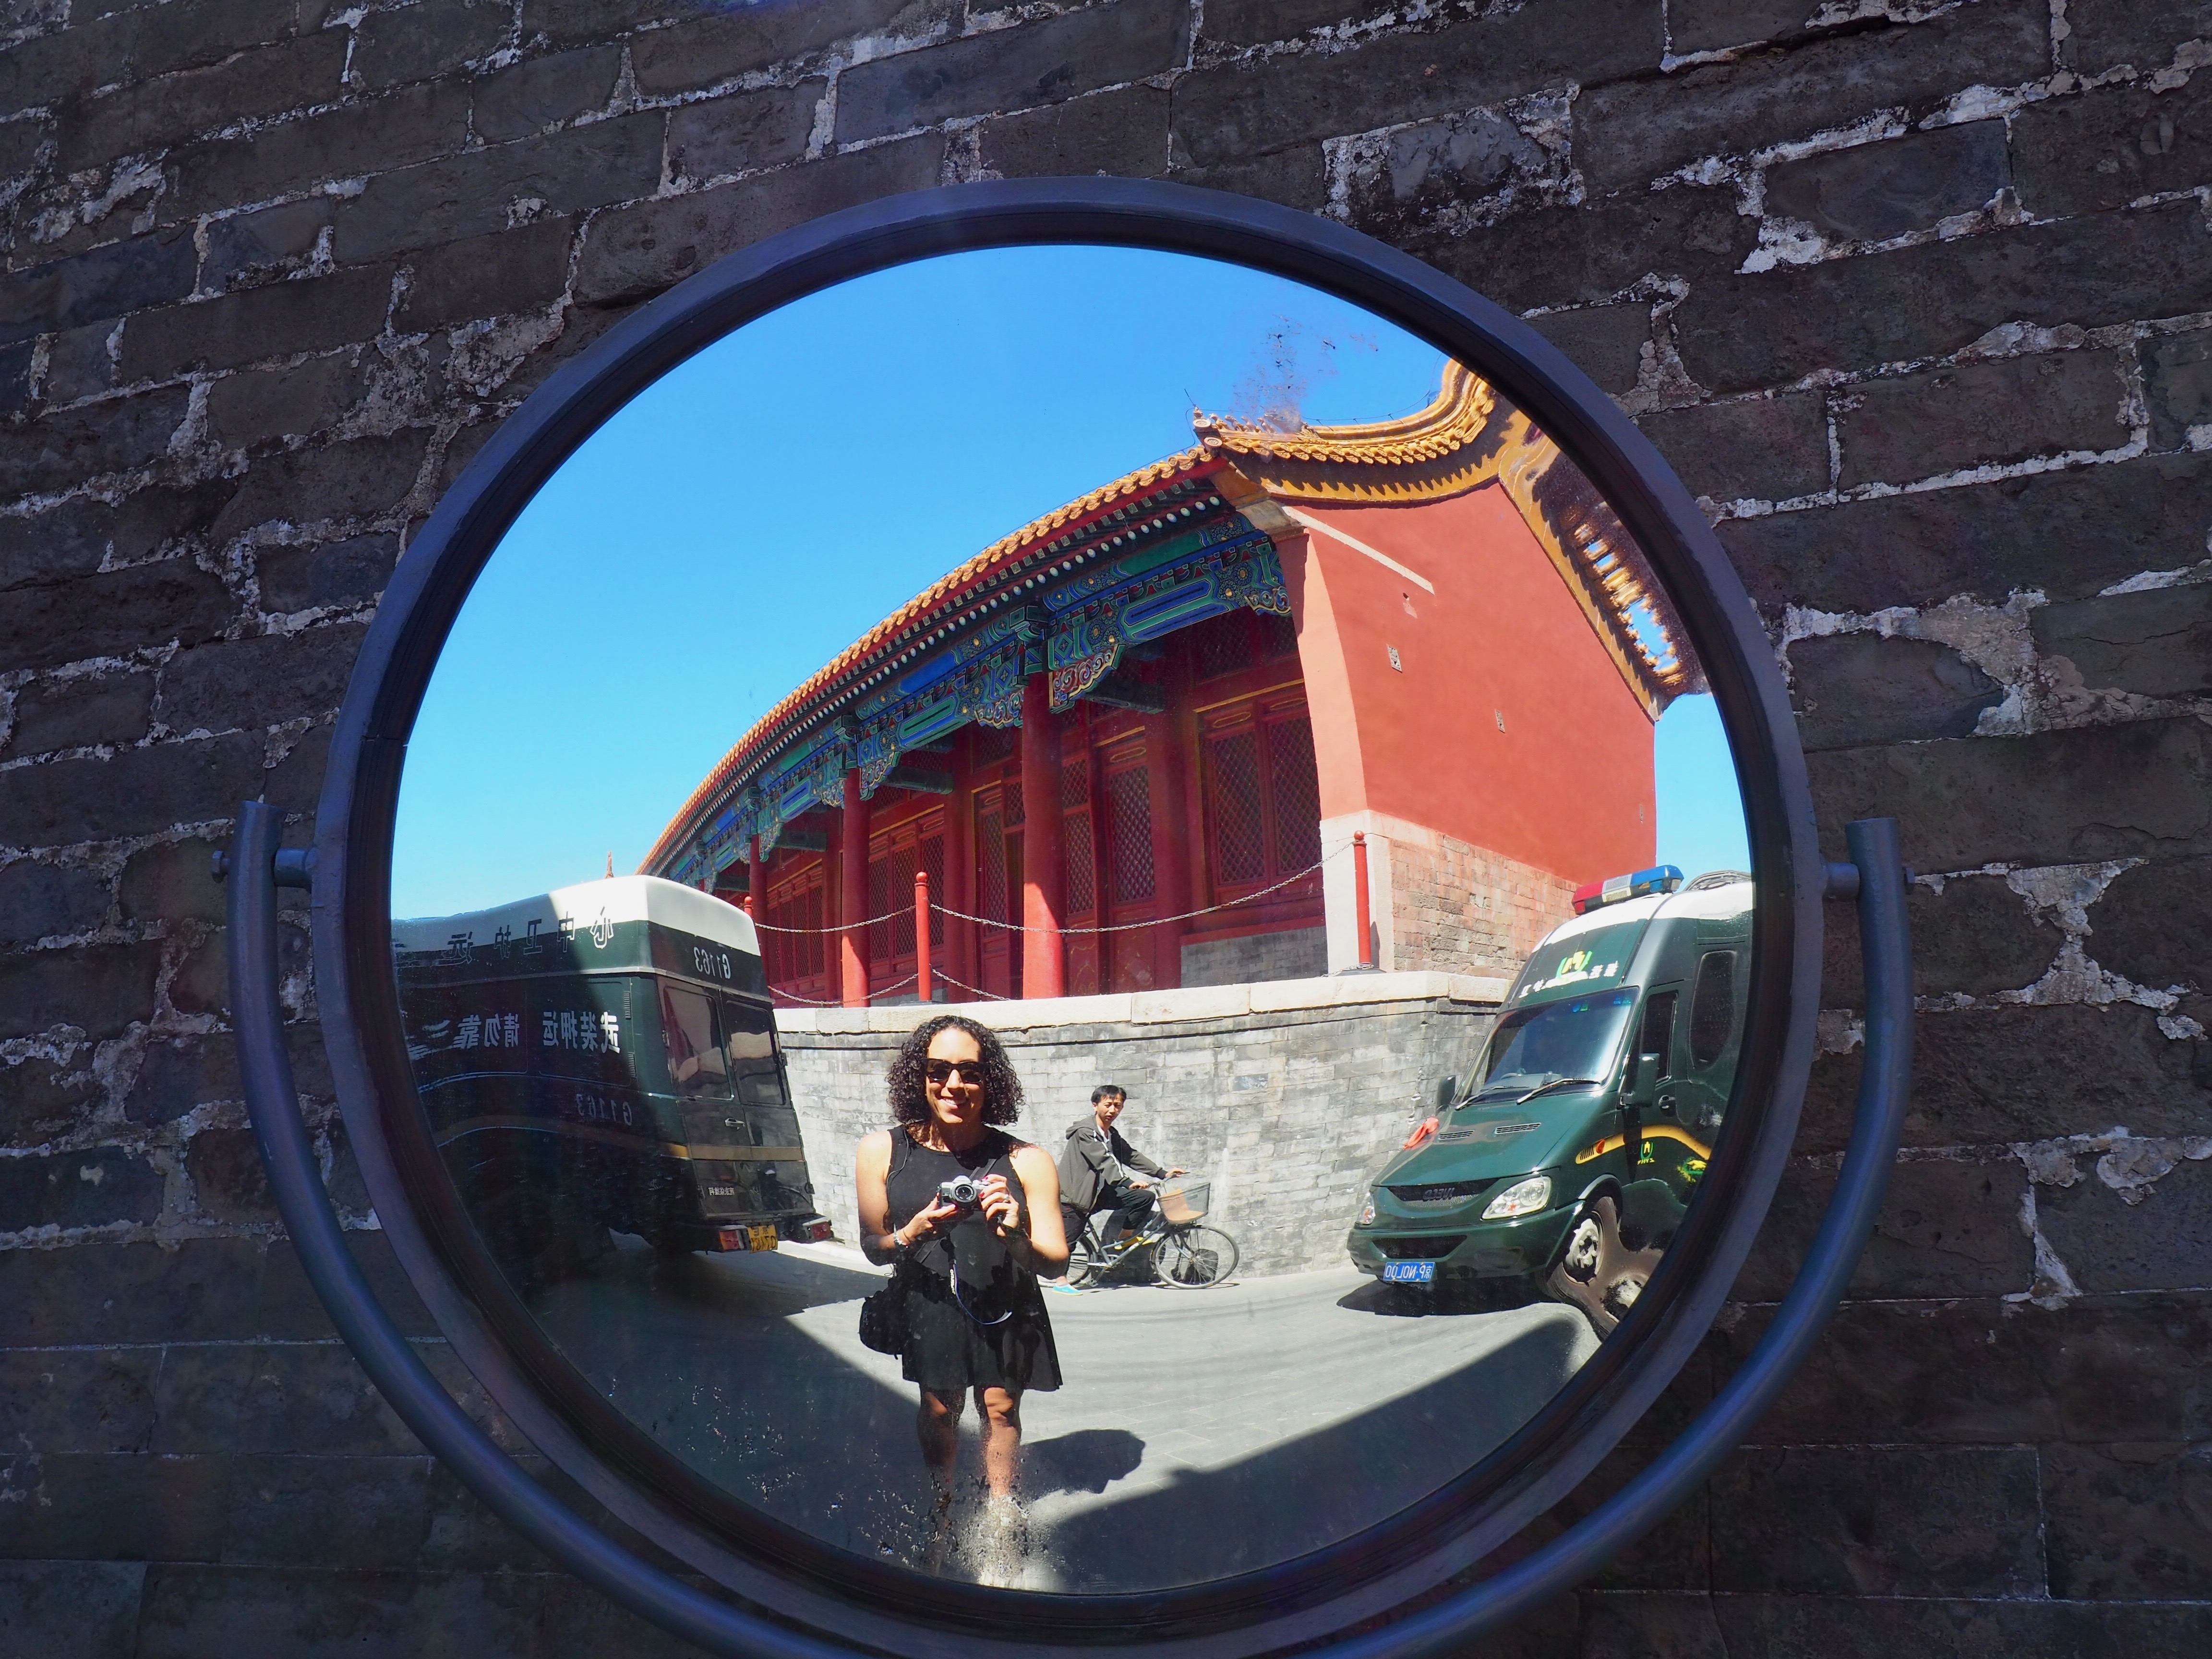
A less literal read of Capa’s statement, and probably the one closer to his intent, suggests that Capa likes photos in which the photographer him- or herself seems to be part of what is going on, and not standing apart from the action. Capa’s solution to get more intimate, engaged photos is simply to be more intimately involved in the photo yourself.

5728297735_327ffa8345_b (1)
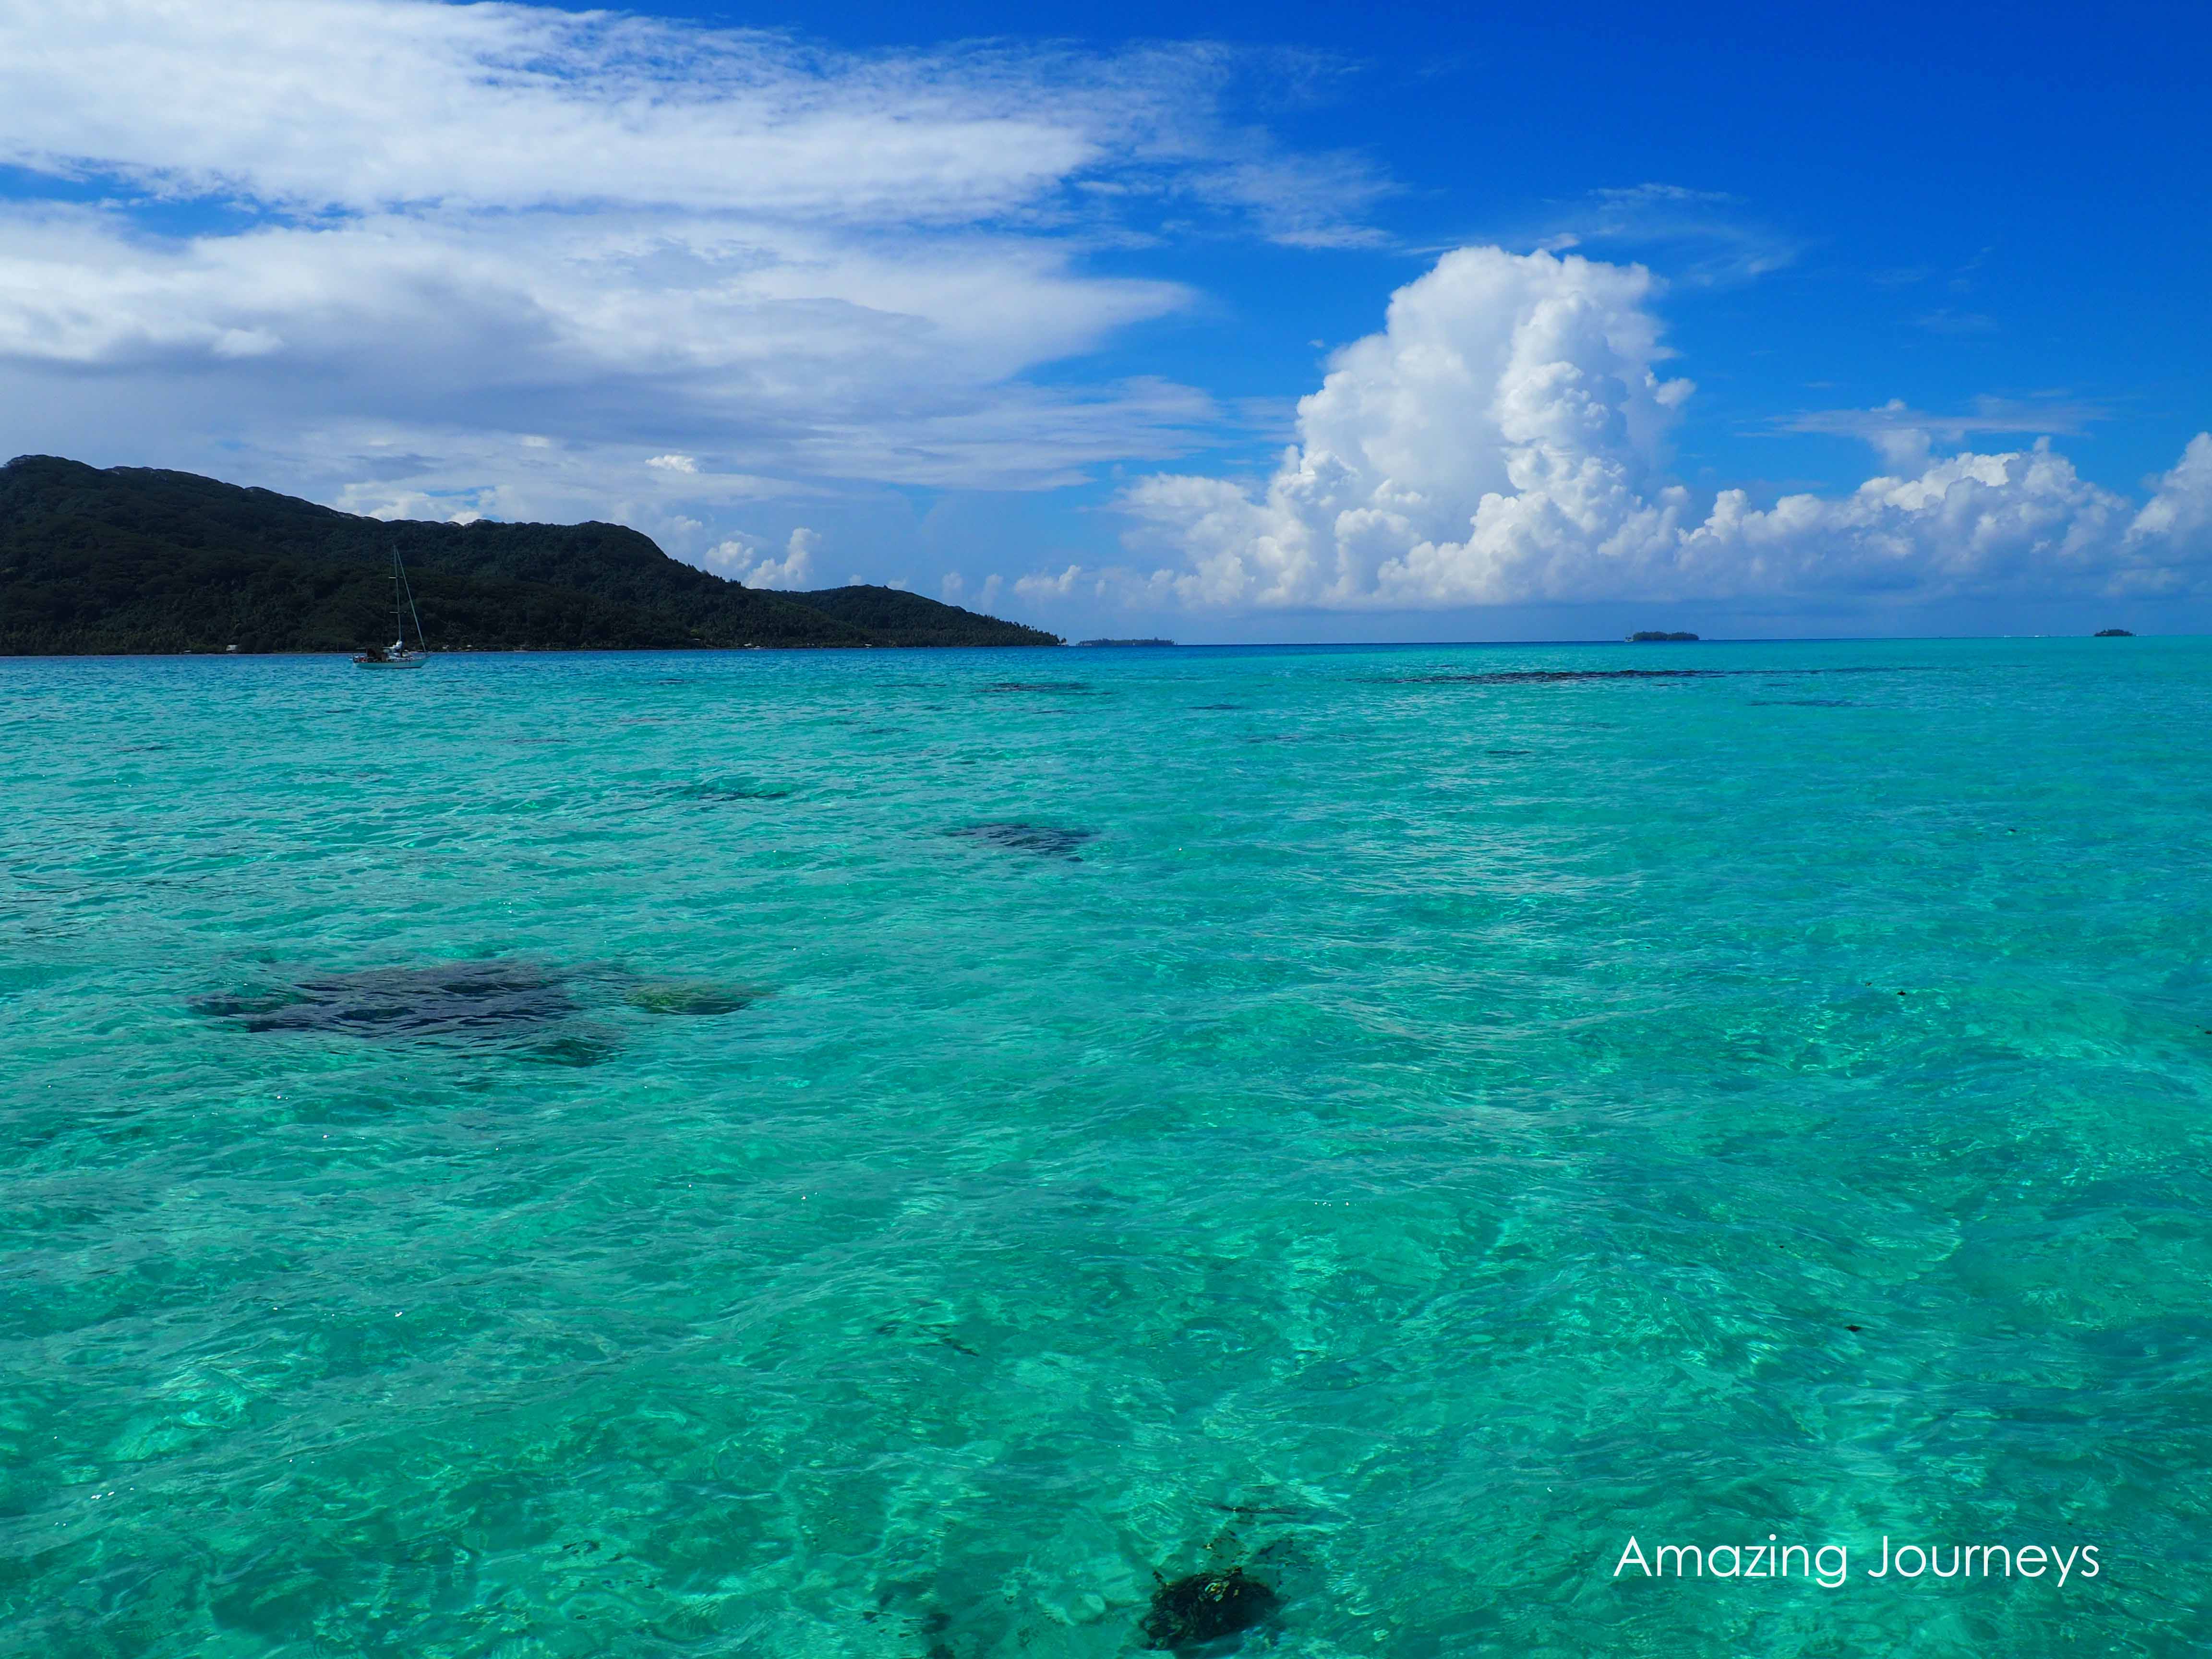
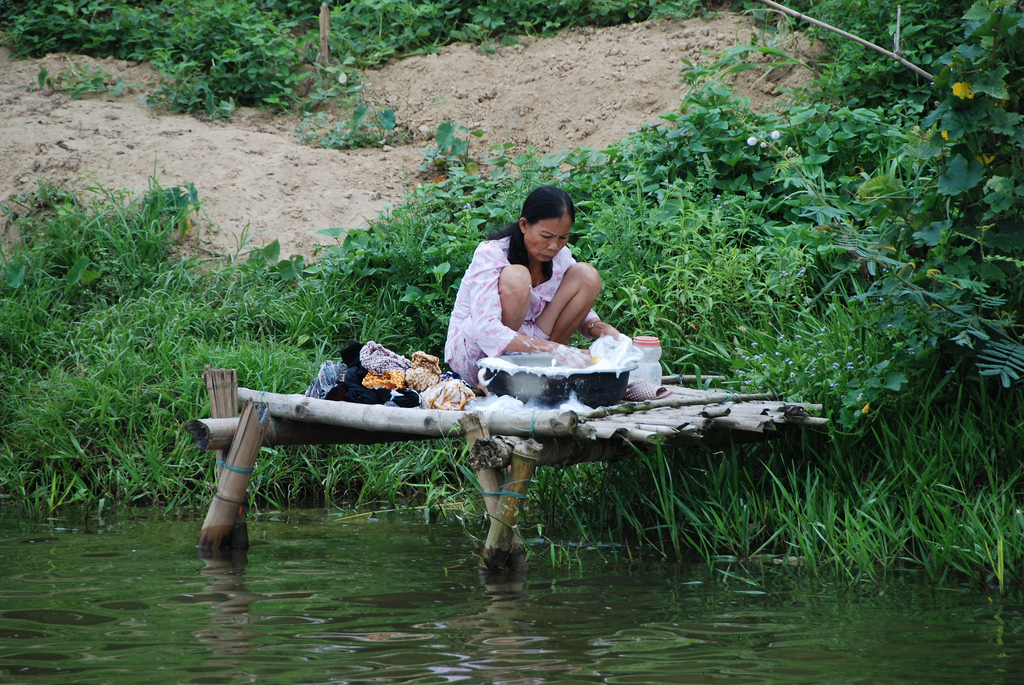
Know where the sun is.
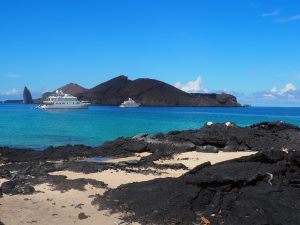
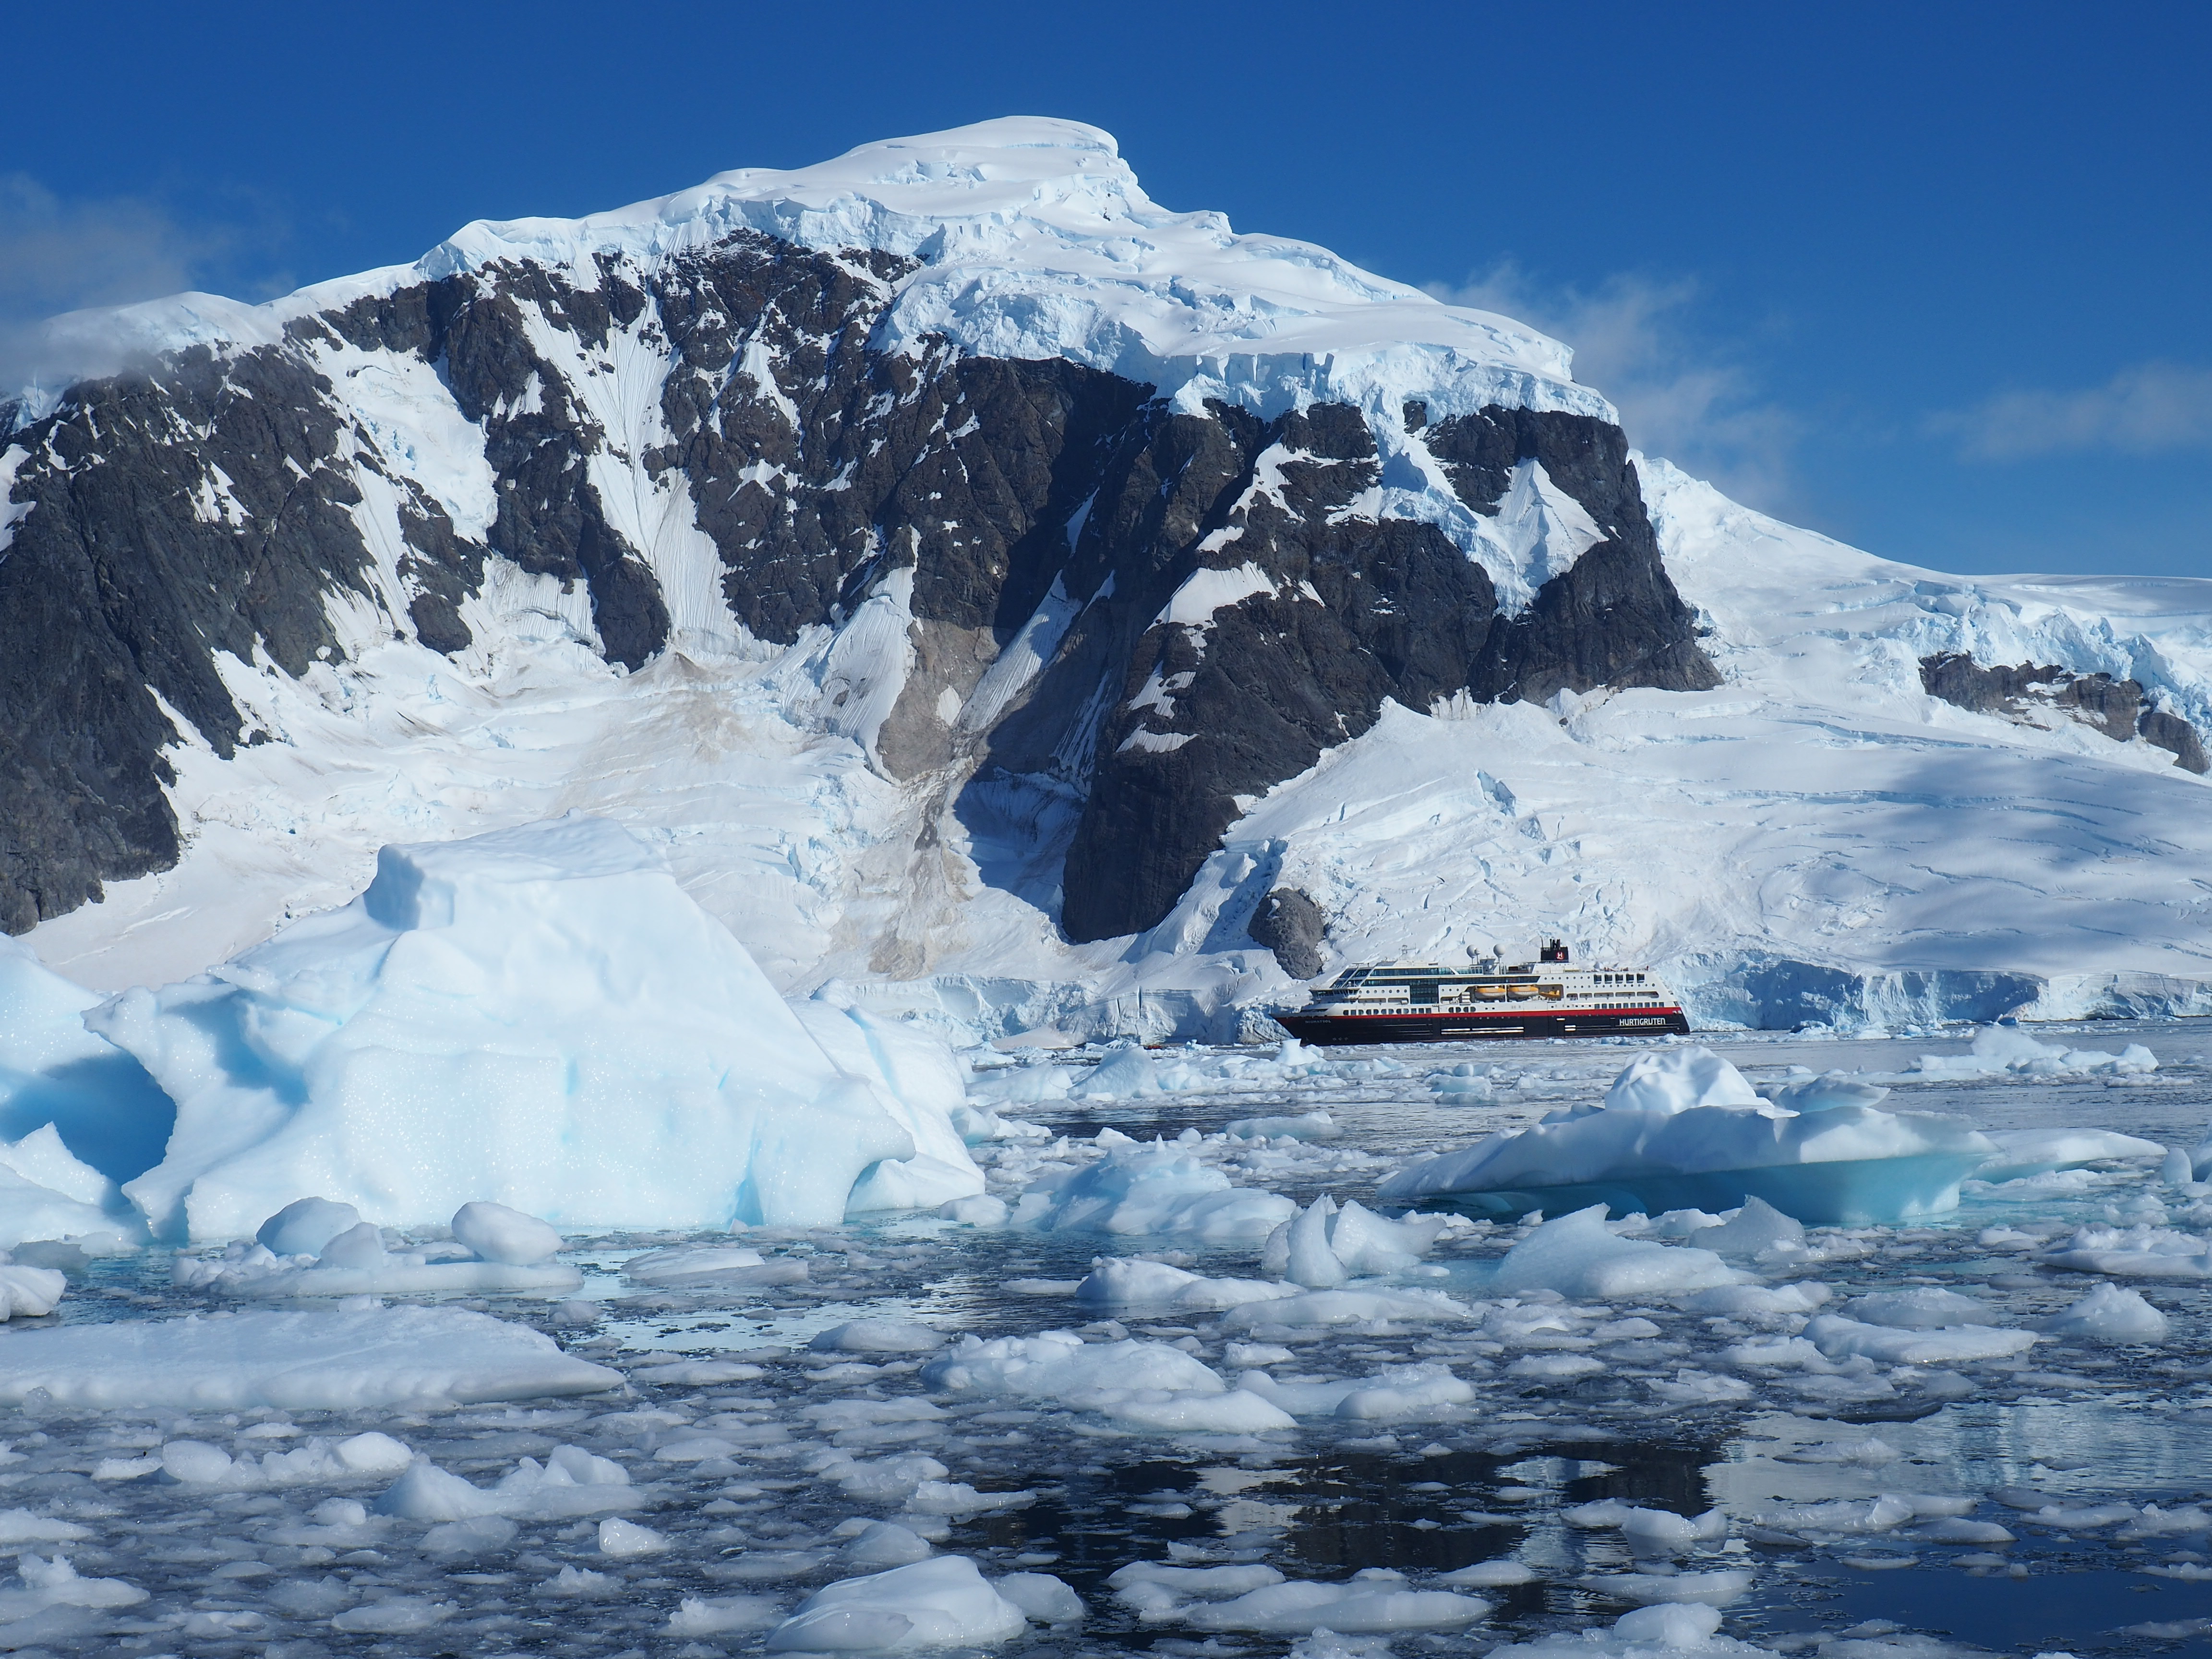
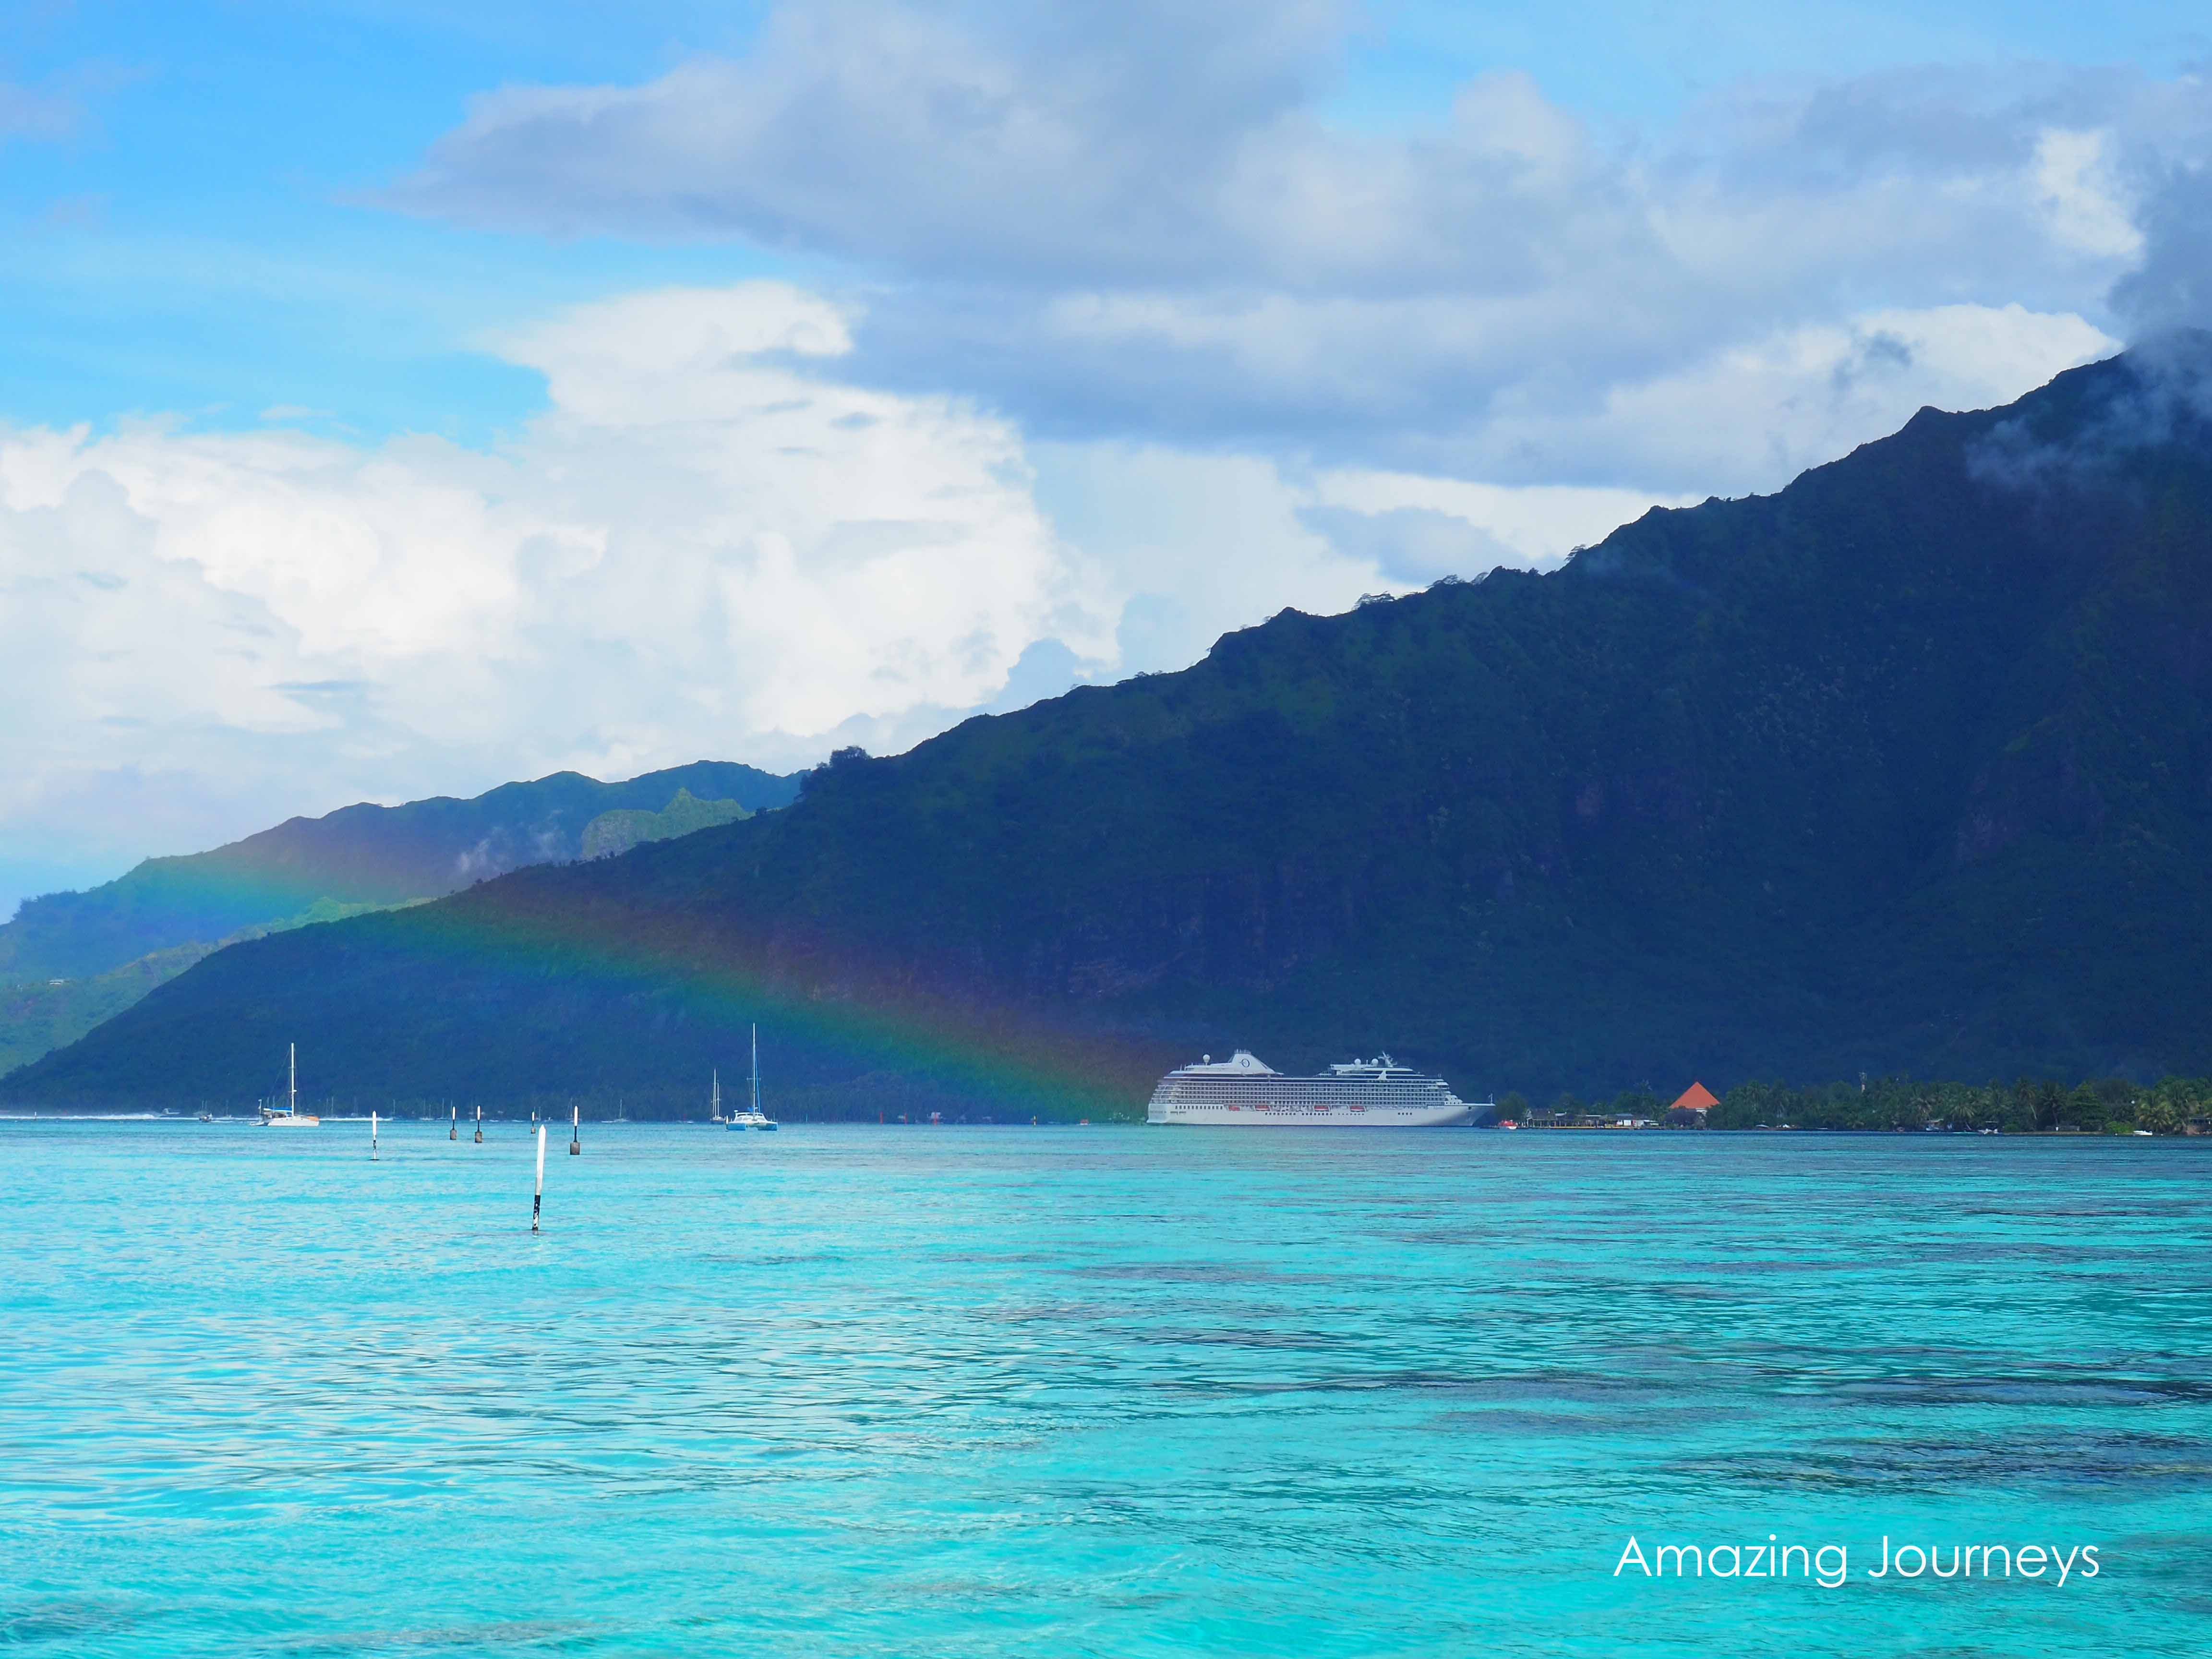
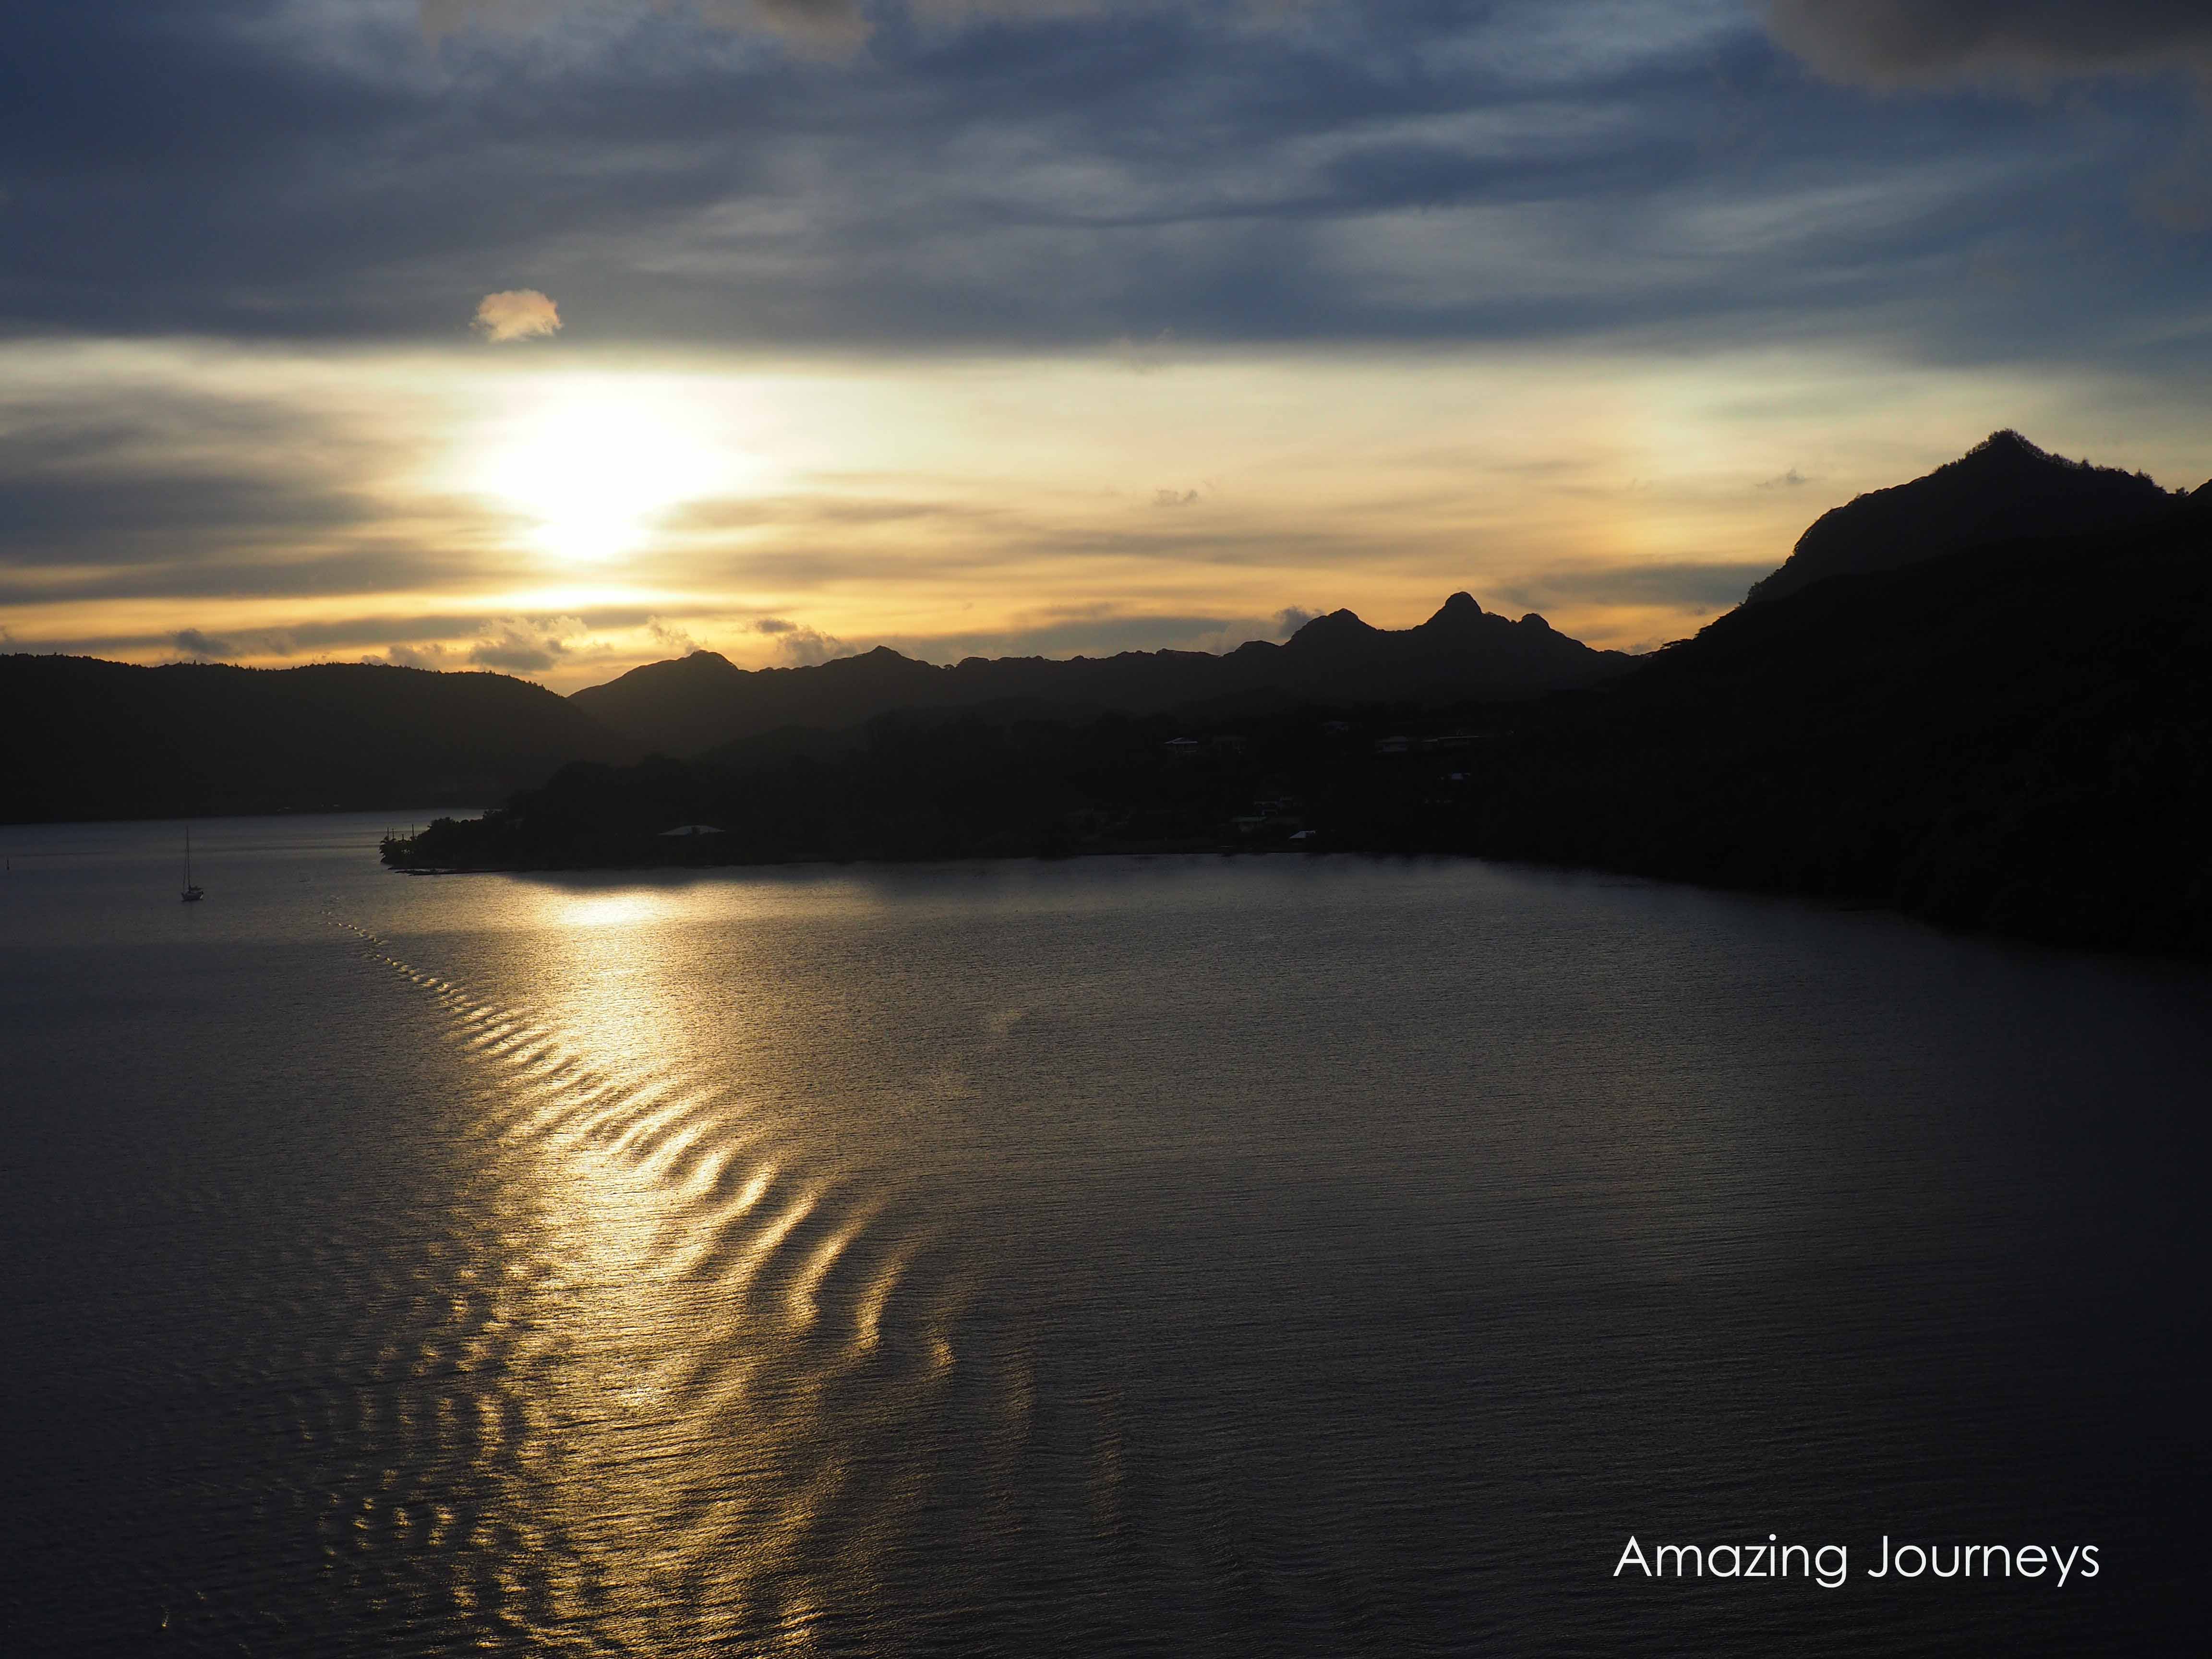
The easiest way to flatter your subject is to put it in the best light. If you want your subjects’ faces to shine, turn them so the sun is shining on their faces. If you want your photo of your cruise ship to look like the brochures, take the photo on the sunny side of the ship. Alternately, if you want to catch the glistening of light on the ocean, take the photo when the sun is low enough to bounce off the waves.

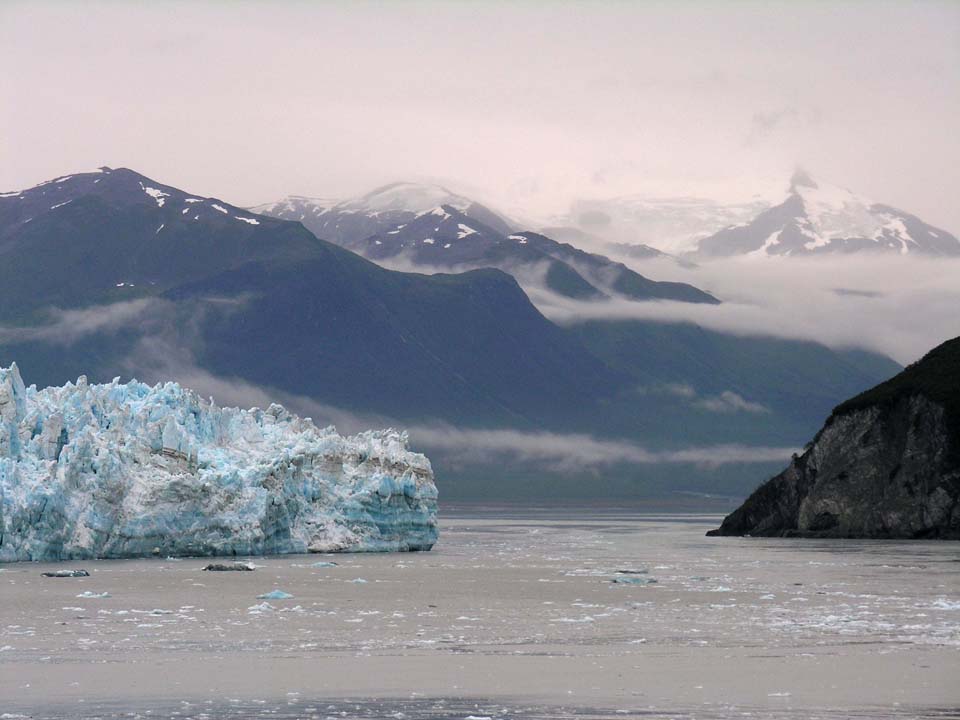
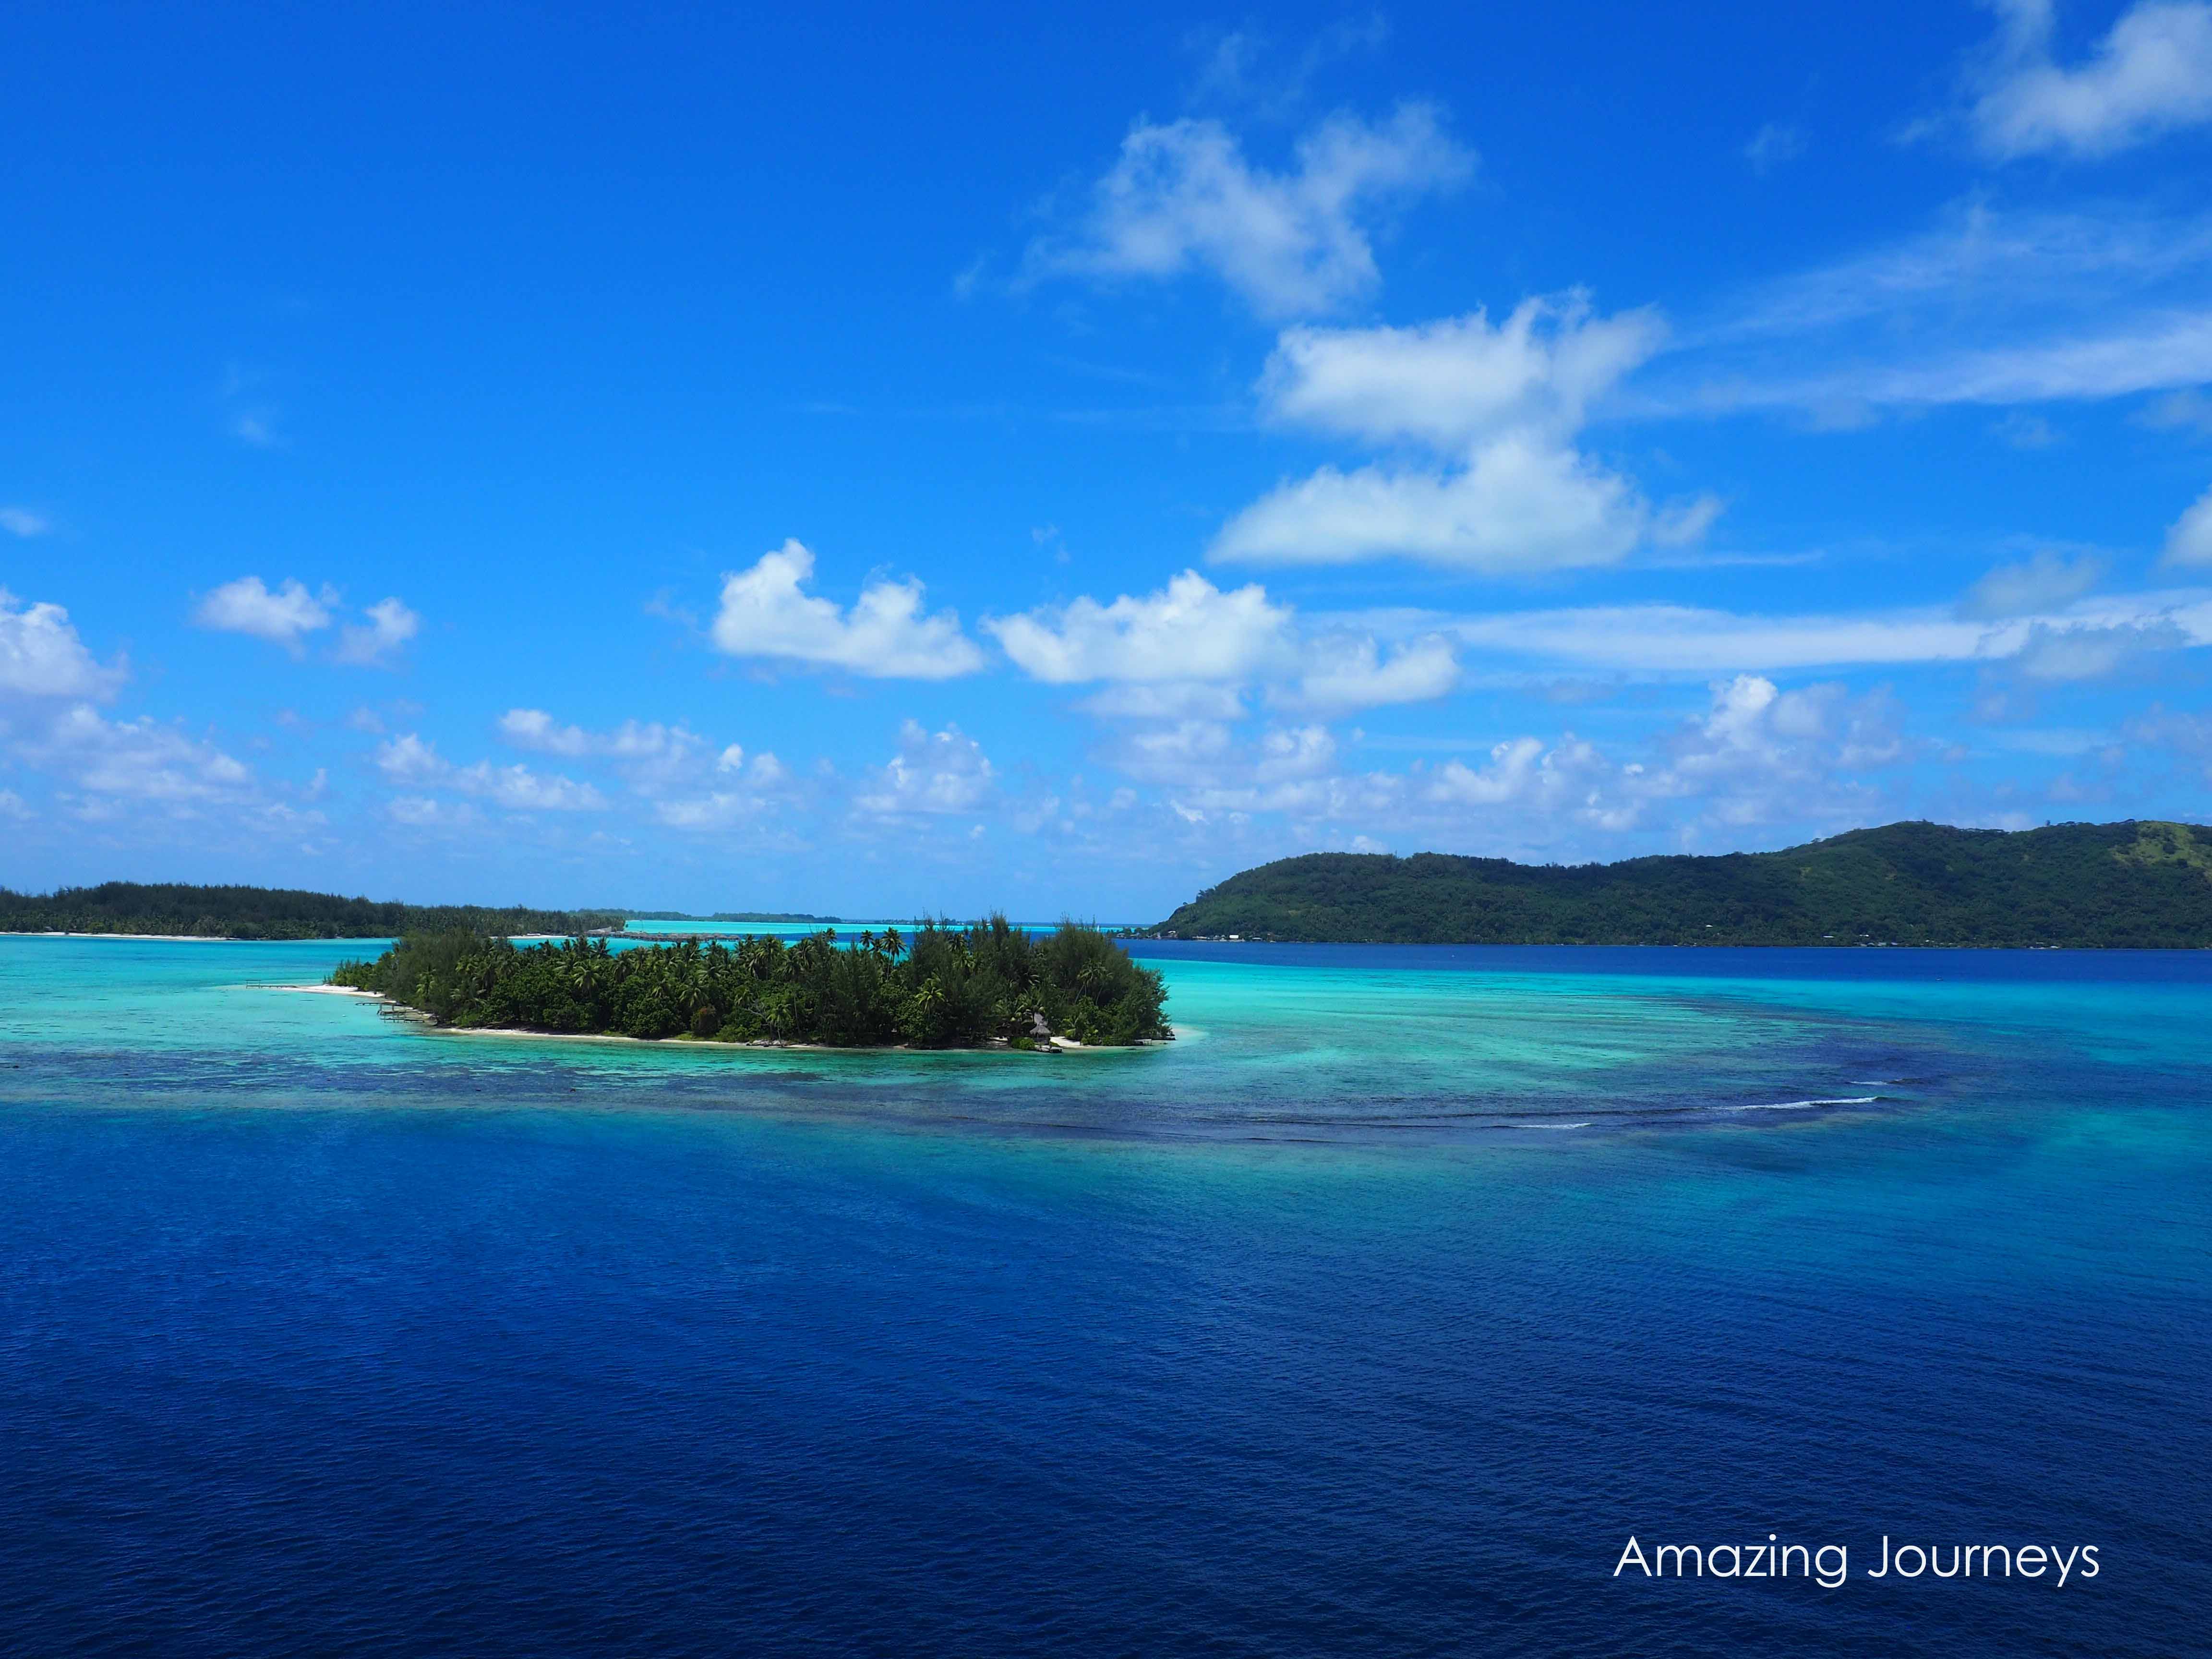
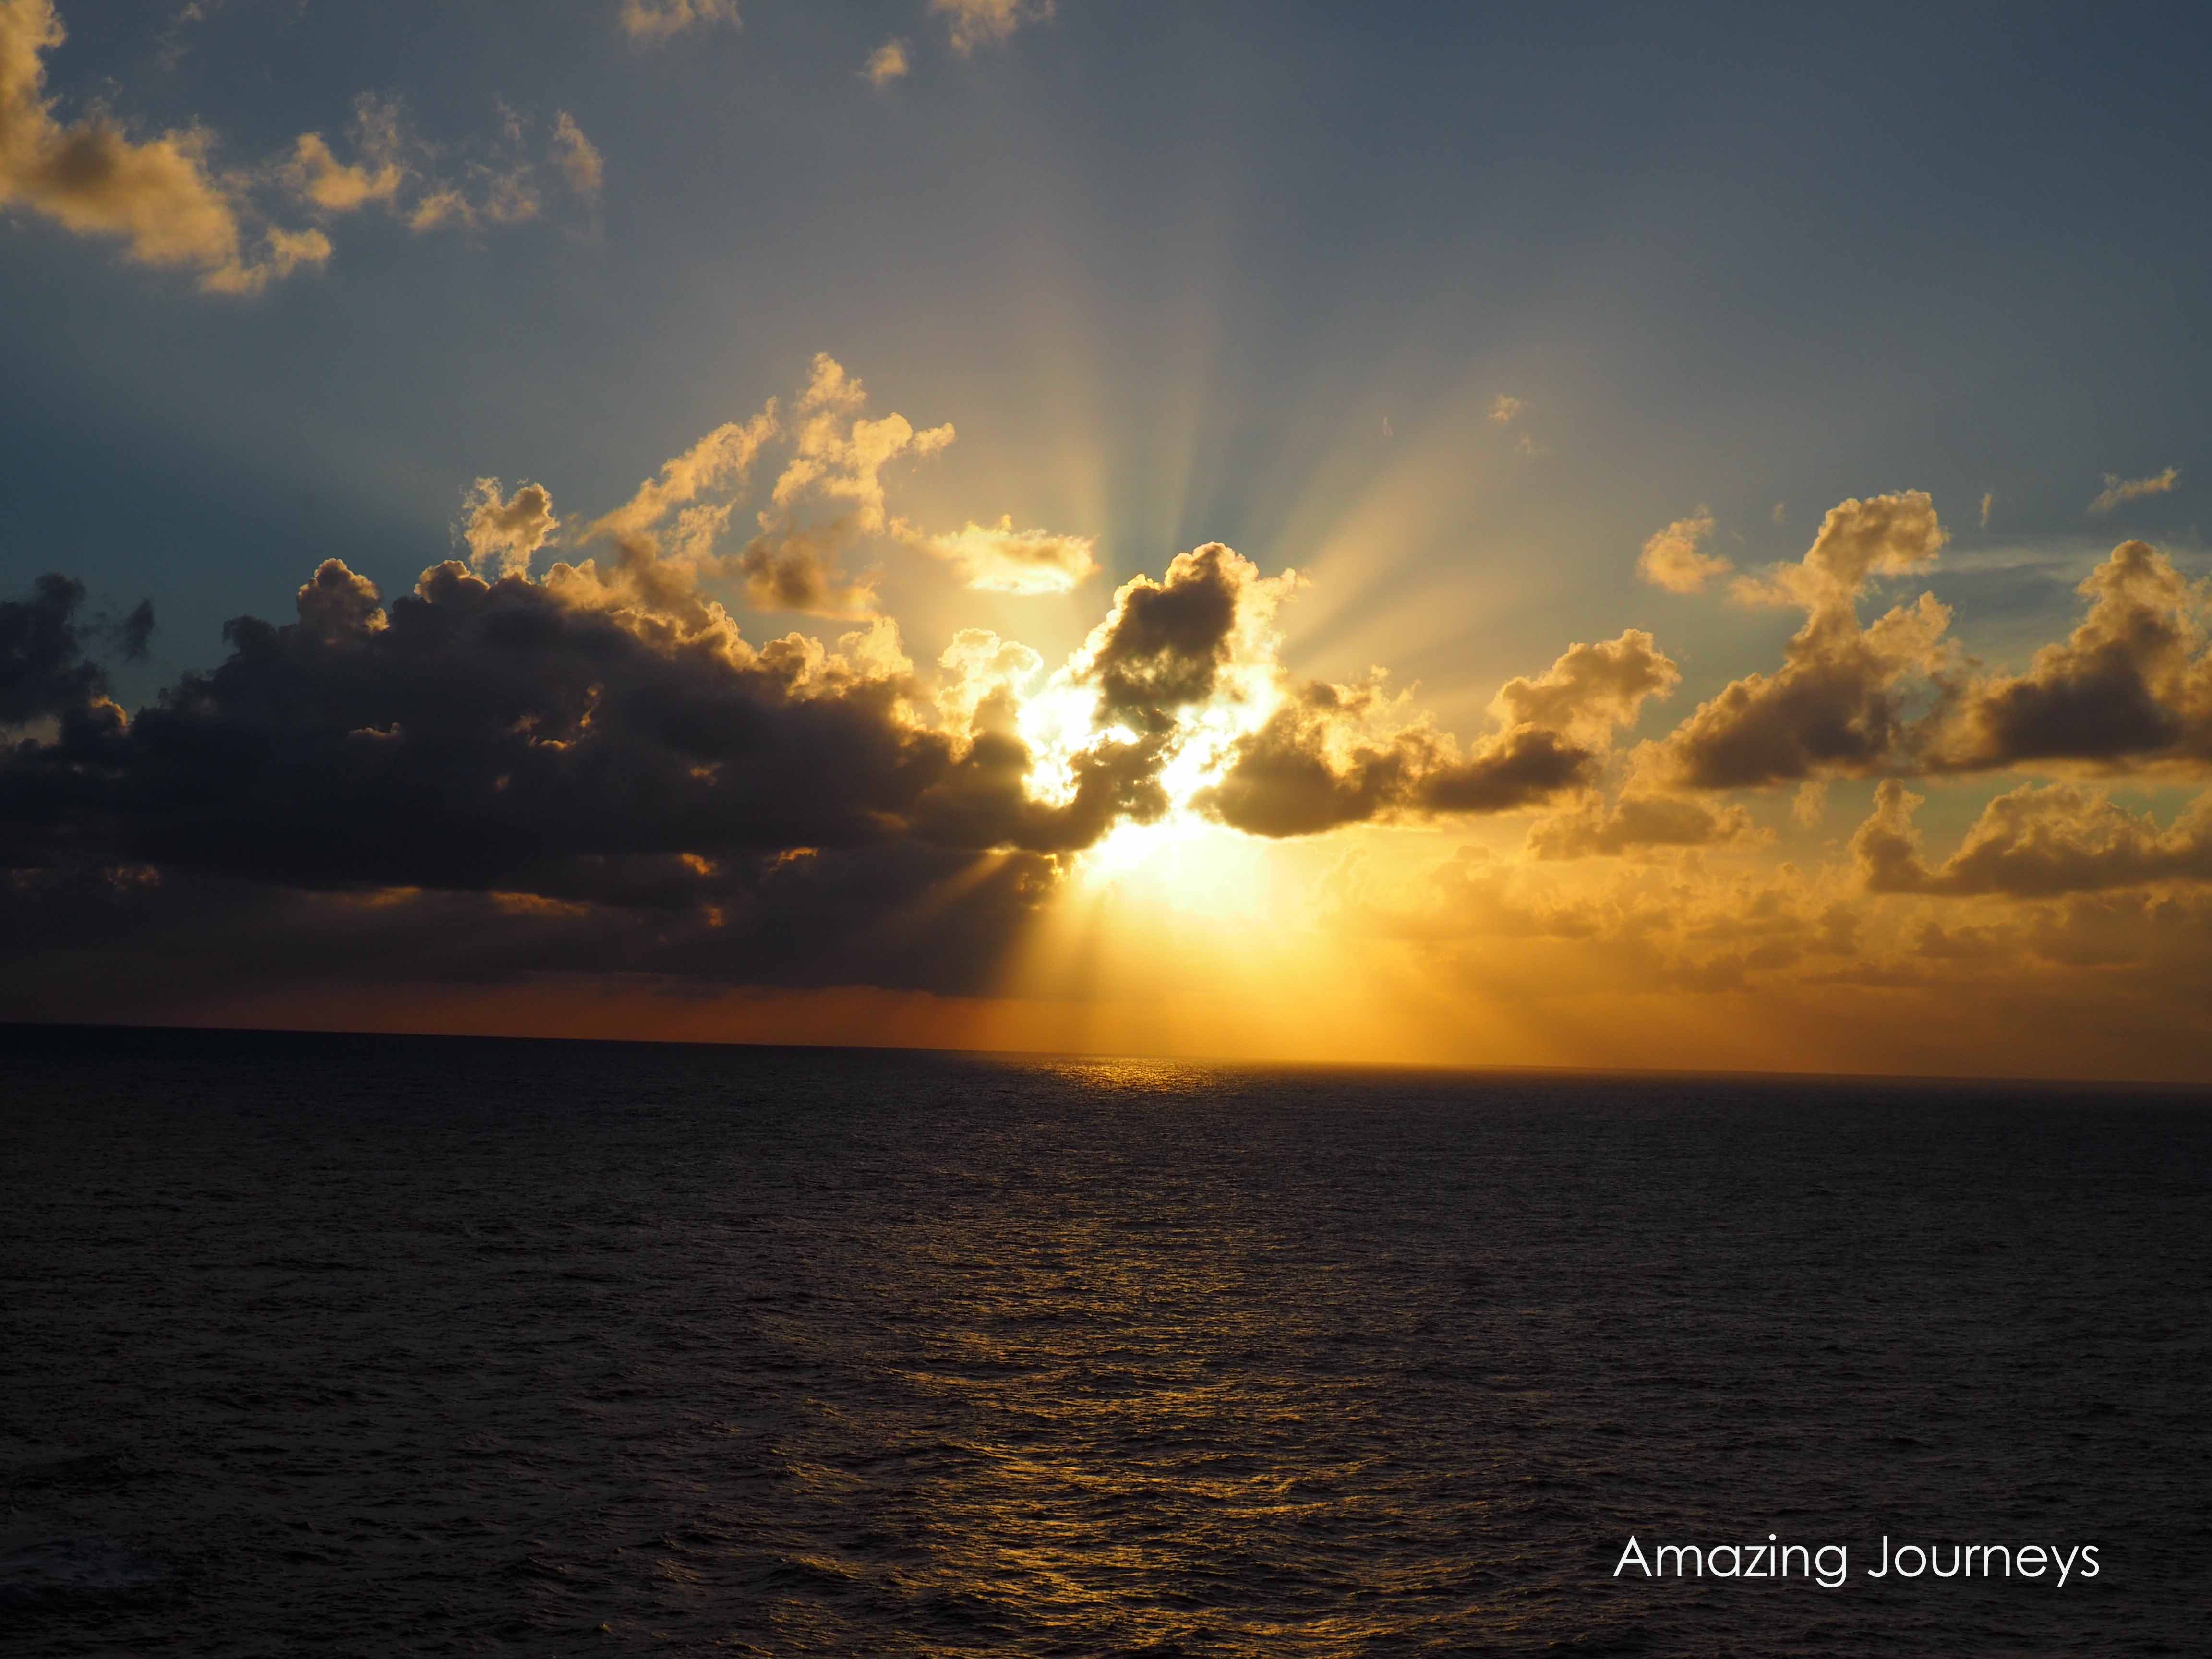
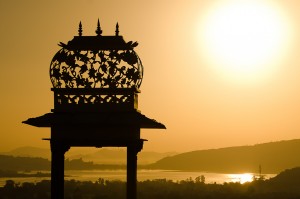
Consider the time of day.15635520540_e3ceb753aa_k
This is a fairly simple story – there’s no time like sunrise or sunset to take compelling, interesting and even stunning travel photos. Sunrise in particular can produce very striking images, in part because most people are not awake at the crack of dawn, and so can still be surprised by a sunrise photo.

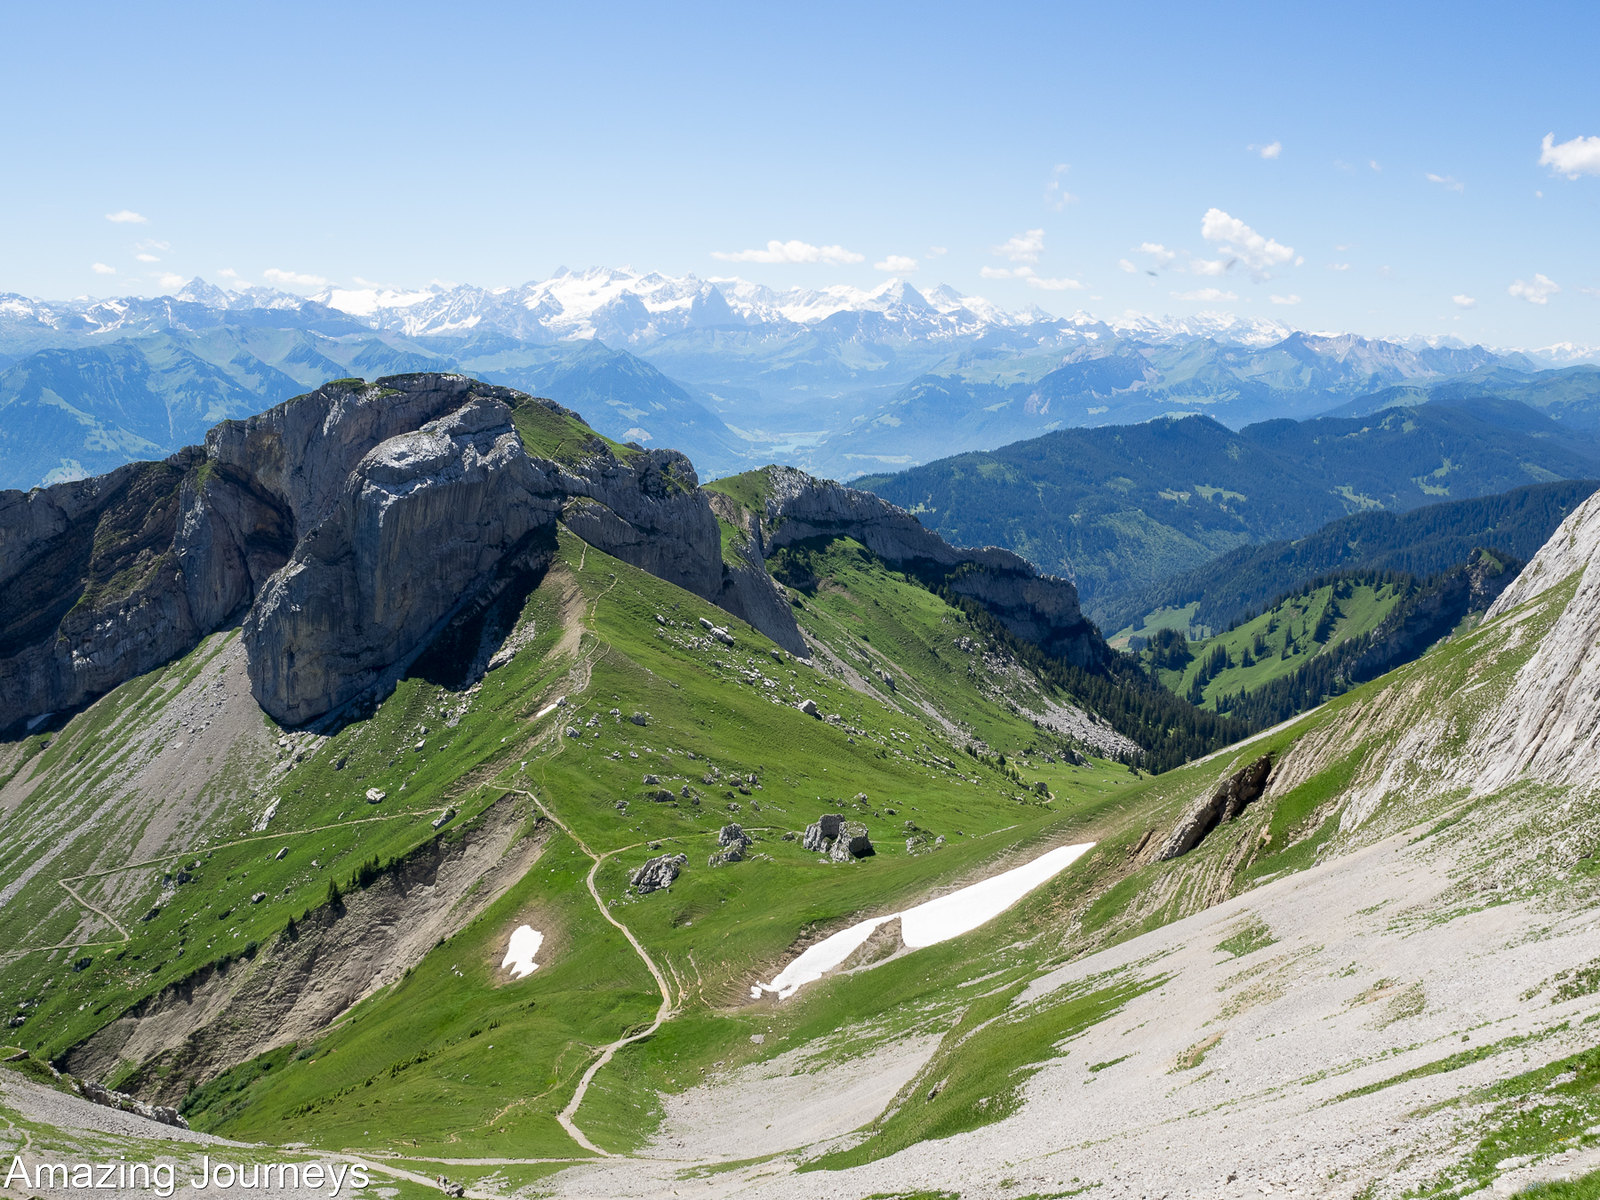
Turn the camera on its side.
In some situations, turning the camera on its side to take a vertical shot is just not good composition, it is almost essential. But taking vertical shots also has an added benefit: it will enhance the interest of your overall photo collection considerably, adding geometrical variety as folks flip through your vacation slideshow.

5728340461_b4ae53db20_bFill the frame.
The interesting parts of the scene should start at the left edge of the viewfinder and end at the right edge. That is, the subject should absolutely fill the frame such that the edges of the photo will include as little superfluous imagery and information as possible.

I find this tactic offers a couple of distinct advantages. First, the intended subject of your photo is absolutely clear to anyone who sees the photo. And second, the photo becomes a thing apart from how we usually see the world, which is more or less in 180-degree panorama thanks to our peripheral vision. A photograph can isolate and amplify our experience, which turns out to be one of the attractions of travel itself, as well.

9127445666_7df279c0a8_b
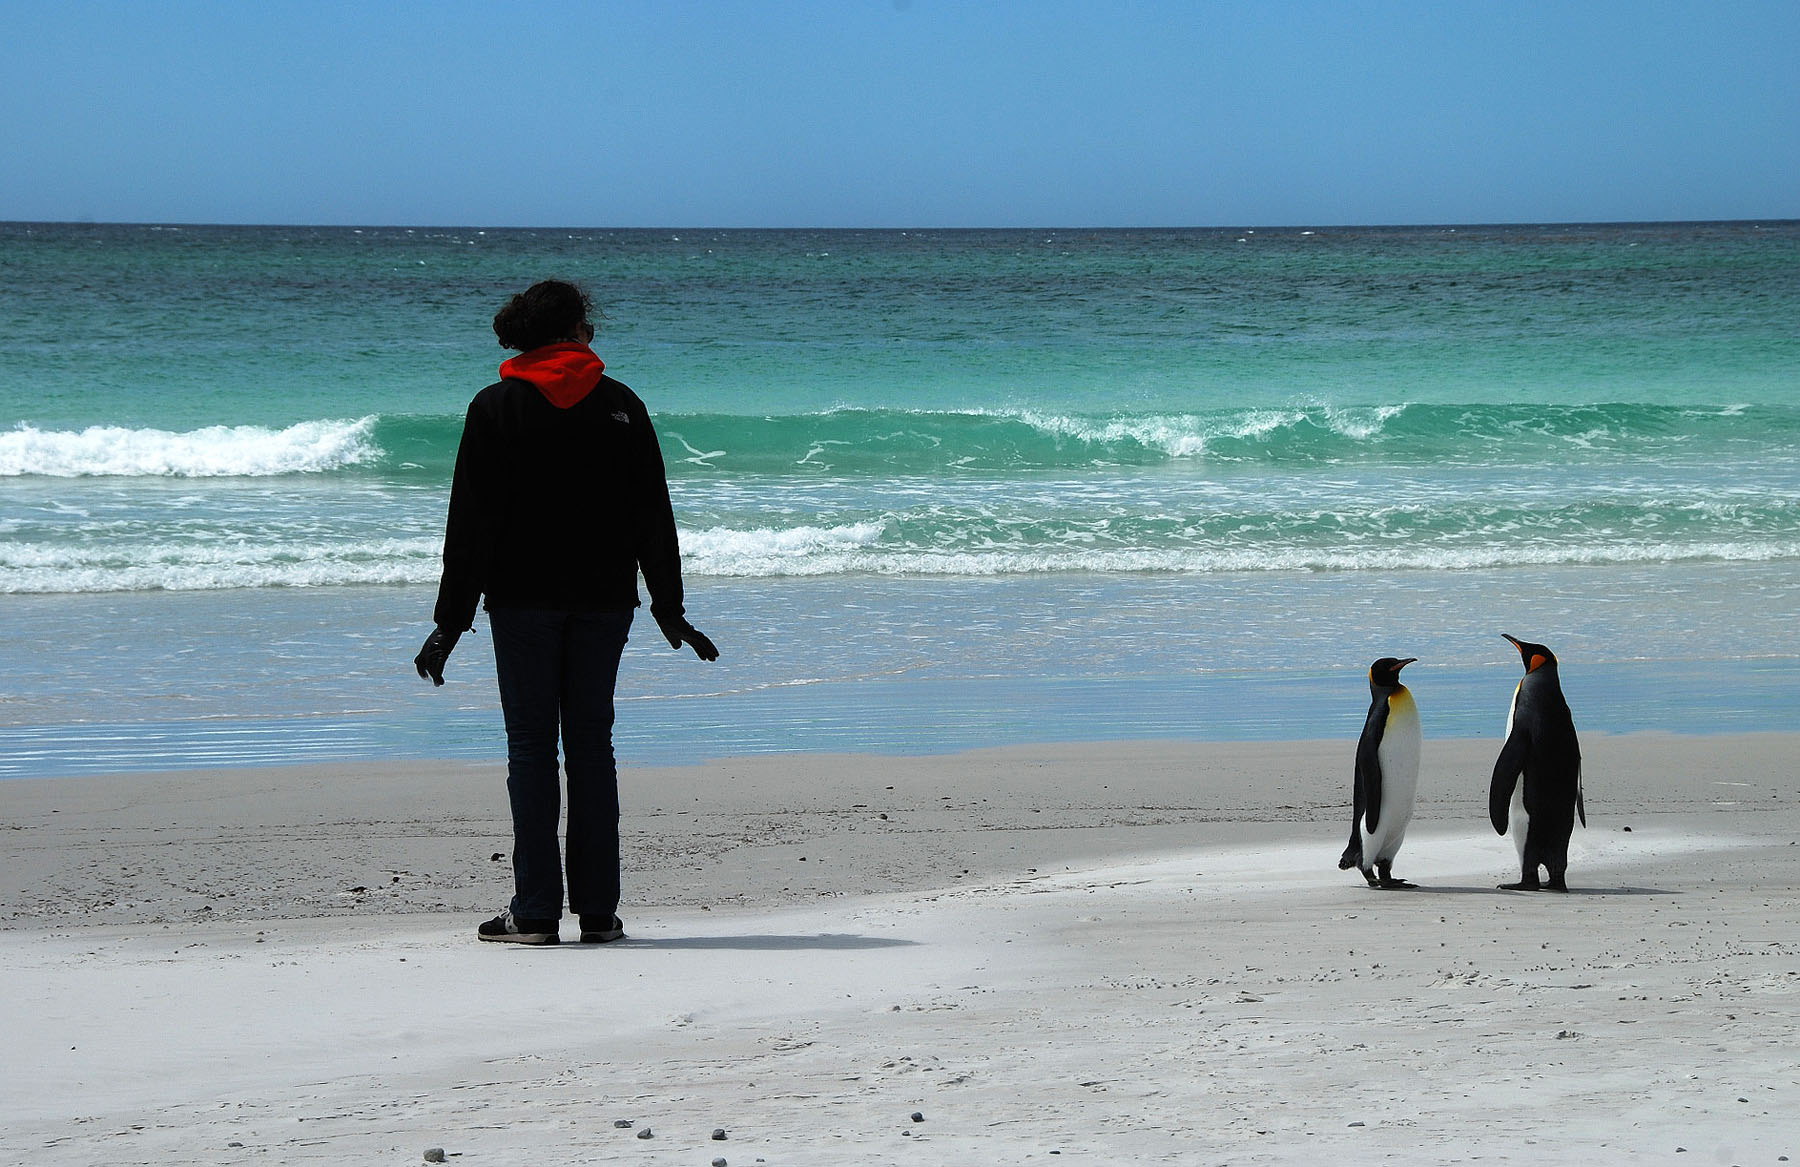
Divide the scene into threes.
If you put something right in the middle of the frame, the photo is about that thing. Another great tactic for creating visual interest in a somewhat routine shot is to frame the shot such that your subject is not in the dead middle of the photo, but is placed off-center in the frame. An easy way to think about this is mentally to divide the frame into three sections (left, center and right), and put the main subject of the photo either entirely within the left or right section, or perhaps right on the line dividing two sections.

How to choose on which side to put the subject? This is easy – put it on the side that has the least background interest in the overall frame. This way, the viewer can be tricked into thinking you took a photo of both the subject and the background activities, with equal emphasis on both.

You can also divide the photo vertically into threes as well so that you have a grid of nine squares total to work with.

When taking photos of traveling companions, it is easy to prop them up in front of something interesting and then take the picture. If you go to some effort to get the attraction behind them, but cut off the top of someone’s head, or include a sloppy untucked shirt, or cut the photo off at someone’s socks, you have a good photo of the sight and a terrible photo of your friends. In this case, frame them first and then worry about the background.
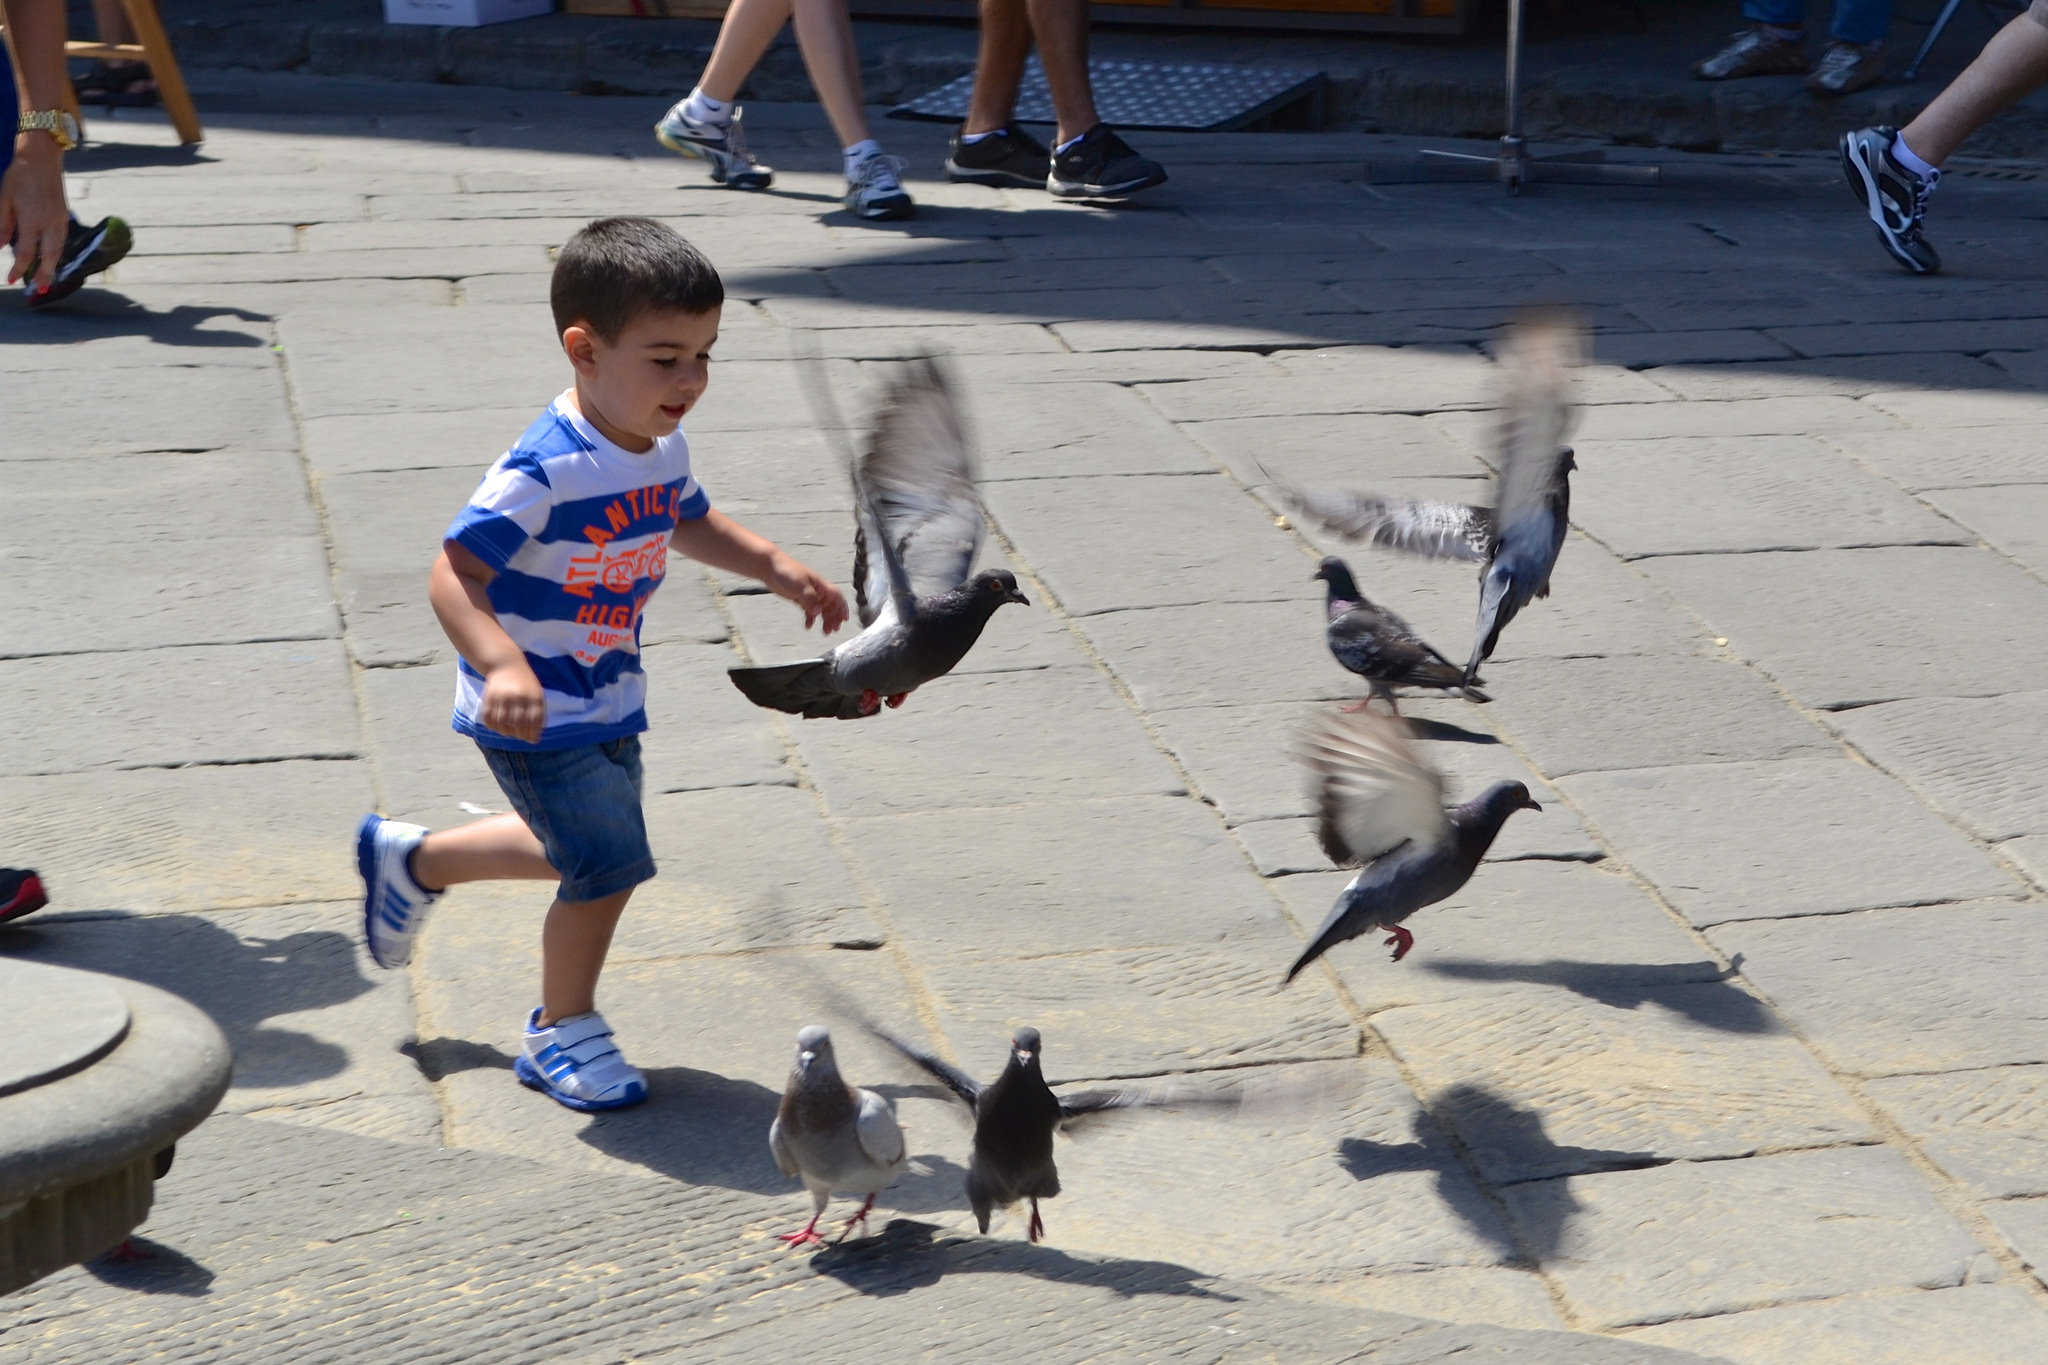
Move.14323278473_eb31453a1b_b
I find that very often a decent photo could have been a great photo if I had just moved a little bit, whether to reframe the photo slightly, or to put something interesting into the background. This can involve moving a few steps forward or back, shifting to one side or the other, or crouching down. As a photographer, you have much more control over what you are doing and where you are standing than you do over the subject matter; if you just stand lead-footed in one spot, your photos will reflect this.

Zoom in and out until you like what you see.
If your camera has a zoom feature, and most do these days, you can help yourself to “move” by zooming in and out on your subject. I find that when you do this, at the point the scene becomes most interesting, your eye will notice it – that is, you’ll just like it more intuitively. That’s when you take the shot.

4588278443_6a3ee4f058_bPay the most attention to the edges and corners.
A great photo is as often defined by what is left in as by what is left out. You have considerable control here, and while it is normal human behavior to look directly and in a concentrated way at the things that interest us most, the camera behaves otherwise.

Very often you can take a photo that seems like it might turn out extremely well, but when you see the print of a photo, your friend is a speck in the middle of a nondescript background. Take all that stuff out, and you have a great photo.

In the same way, if you zoom in very closely on someone’s face, and cut out the monkey standing on her head, you missed the shot.

4508752325_da920c1ddf_b
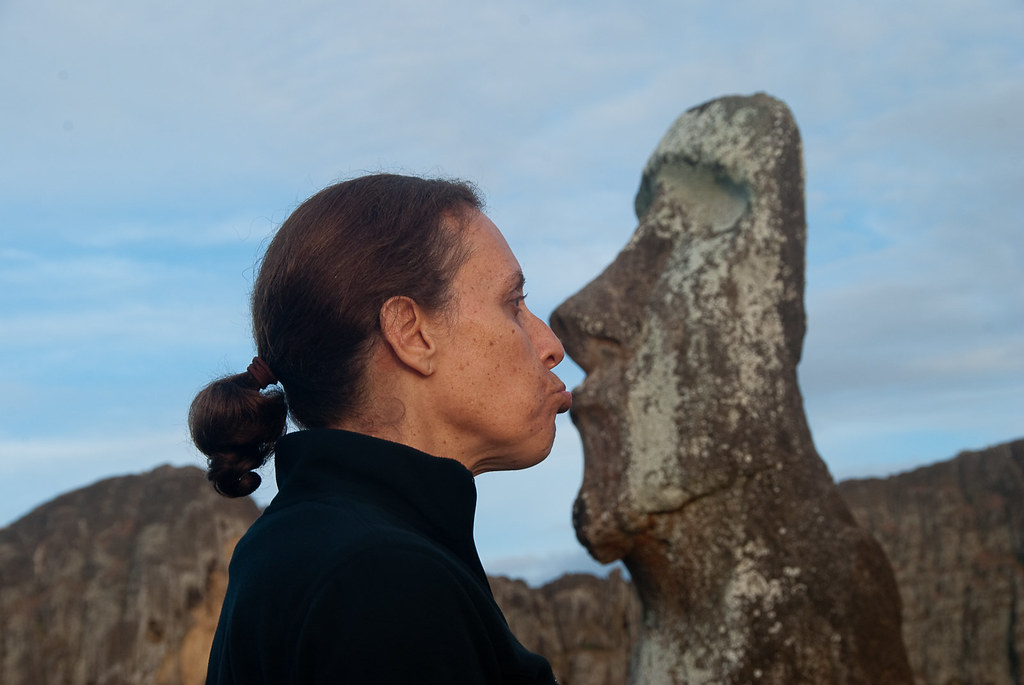
At familiar sites, emphasize something other than the subject.
If you are photographing the Eiffel Tower, Big Ben, Mount Rushmore or any other frequently photographed site, you would often do better to buy a nice calendar than take yet another point-and-shoot photo that will just take up space on your hard drive until it crashes.

But if you make it a photo about something else – your companion’s goofy hat with the Eiffel Tower in the background, or a bobby in front of the Houses of Parliament, or a motorcycle gang parked in front of Mount Rushmore – then you have a great photo.

Look, then think, before you shoot.
Before taking a photo, if you just take a quick look at your surroundings, and give yourself a second to think about anything interesting that might be happening, you will get a much higher percentage of interesting photos than if you simply pull your camera to your eye and snap without planning what you want to capture.

14609595601_94969e17a1_kTry to take photos where you didn’t “have to be there.”
If you want to take a great photo and not merely a snapshot of your traveling companions in a certain location, think about how a complete stranger would react to seeing your picture. Photos that are thereby intrinsically interesting will enhance and retain their interest to you as well.

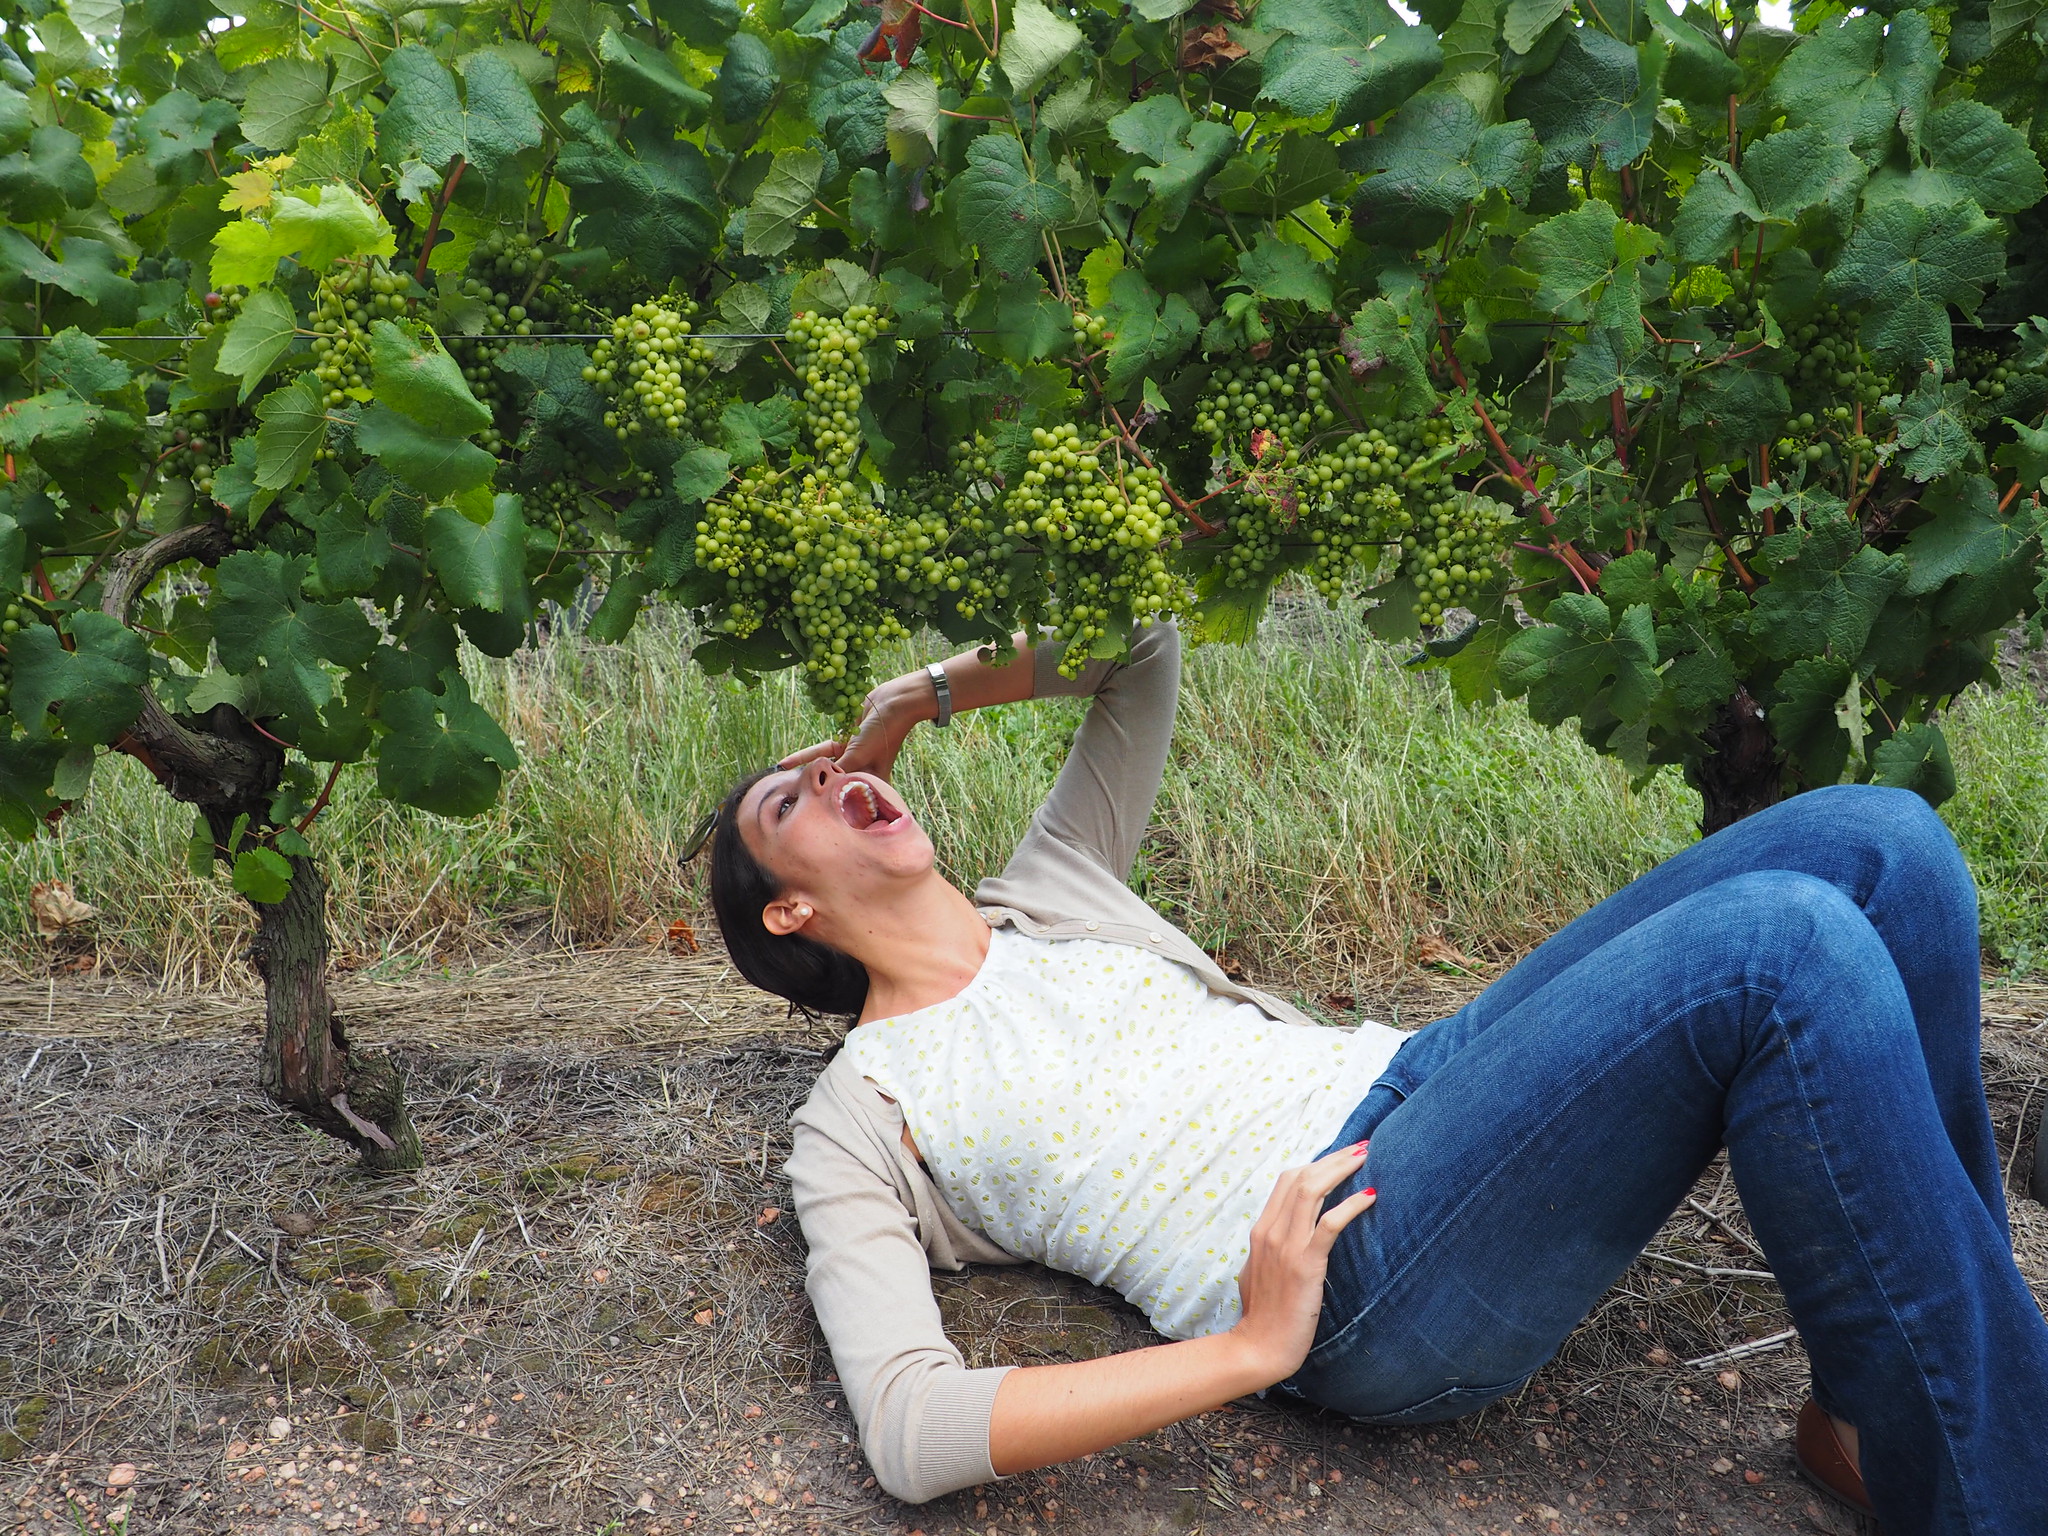
Use your sense of humor.
Do not underestimate the value of capturing or expressing a little humor when taking travel photos. Travel is usually as much about how we felt and thought while traveling, not just where we went, and photos that capture some humor often bring back the strongest memories and sensations as time goes by.


Edited from article in Independent Traveler

Brrr..Don’t let cold snap the bite out of your scenic winter photos

Tuesday, January 18th, 2011
-a guideline to taking pictures in an outdoor cold setting…compliments of Barry Asman: AJ’s resident paraprofessional photographer-at-large:
Whether you’re joining us on our Winter trip to Alaska or just taking pictures in your neighborhood this winter, cold weather photography can be some of the most exhilirating shots you ever take, but these shots present some challenges.  These revolve mainly around the weather and climate we will be enjoying.  What comes to mind initially is the temperature that we will be experiencing.  Our winter temperatures will be COLD, sometimes well below ZERO!  This extreme cold will produce some interesting camera problems.  Preparing to take pictures in Alaska can be divided into two categories:  1) taking care of your camera and 2) taking care of yourself.
First, most important and most basic, is to take care of yourself.  This means staying warm, especially keeping your hands warm.  As you are anticipating, the key here are gloves.  What we recommend is to bring a pair of regular warm gloves, and also a special pair of “fingerless” gloves so that you have the dexterity to operate a camera in the cold.  There are several types of these “fingerless” gloves to use.  Our best suggestion is to go to a sporting goods store (or on line) and head to the hunting section.  Hunters use these gloves all the time.  Here is an example of some gloves: http://www.rei.com/product/305045
Now, let’s talk photography!  There are two issues that make photography in the cold interesting; power and water.
First there is the issue of power (batteries).  The thing to remember is that in cold temperatures, battery power goes down quickly.  There is an easy solution to this; carry extra batteries.  If your camera uses regular batteries, just pop a couple of extra sets in your coat, close to your body (to keep them warm).  When the set in your camera gets cold and stops working, just change them out for a “body warmed” set (the cold set will come alive when warmed up again.)  If your camera takes only proprietary rechargeable batteries, go to the camera store (or order) a second battery.  Keep one warm while you shoot with the other; then just swap them out.  Easy enough!
Now, let’s talk about water…condensation.  Here’s the problem…  If you’ve been outside for a while in the cold air, then go inside the warm house; what’s the first thing that happens?  Your glasses fog up.  This occurs when your cold glasses hit the warm air.  The same thing will happen to your camera.  If you take your cold camera onto the warm hotel, the camera will instantly form condensation (water droplets) not only on the camera, but also inside the camera.  Remember, water and electronics are not happy together, i.e. your camera’s guts will “fry”.  Believe us, we’ve seen very expensive cameras with puddles of water sloshing around INSIDE the camera from condensation.
Preventing condensation on your camera is very important and not too difficult.  Here’s the solution:  While your camera is still Alaska cold, put it in a sealable plastic bag, and seal it tightly.  Leave it in the sealed bag until, once back inside the hotel, the camera slowly warms back up to room temperature.  Problem solved!  (Going from warm to cold should not be a problem, only cold to warm.)  You can actually throw a couple of those Silica Gel desiccant packs (the kind that comes with your new shoes to keep them dry) in your camera bag and the plastic bag for added protection.  While some of the above advice may be overkill, its going to be cold and you can never be too prepared.
Some people have asked about bringing a tripod.  Granted, to get good pictures of the Aurora Borealis you should use a tripod.  But, that means you have to carry the tripod.  If you want to get a good travel tripod, you can pick one up that folds small and weighs three pounds (and some may cost up to $600).  The typical non-travel tripod from Best Buy weighs 5-7 pounds and is two feet long (folded)…trust me; you will NOT want to be carrying that thing around.  Another option is to get a small, light flexible mount (http://joby.com/gorillapod) and hope there is something convenient to clamp it to.  There are even Bean Bag camera mounts that are fairly light and easy to use; assuming there is some place to rest it.  The decision is yours to make.  Take a look at what is out there and go with it.
My final words of wisdom:
*Take plenty of Memory Cards
*Take plenty of Batteries and appropriately sized sealable baggies (see above)
*If you’re going to get a new camera for the trip, get it now and learn how to use it now (don’t wait to open the box on the plane on the way to Alaska!)  Practice using your camera and all of its settings.  Being familiar with your camera will pay off in improved pictures.
1…2…3…EXCELLENT!
Happy Shooting!